A friend of mine send me her broken Dymo labelprinter. The descriped fault was “not turning on”.
While I opend up the unit screws and springs fell out – nice start. somebody was here before.
On picture 1 you can see the screws I had removed (top) and the things that fell out on its own (bottom).
After a first inspection I found a stripped cable that wasn’t attached to anything (picture 2) and the negative-site of the battery-array that has no connection (picture 3). The cable was manually stripped and too short for the way. It was in fact the powerline for the mainboard (see 4).
After soldering a new wire to the board and the terminal (picture 5 & 6) the printer shows its first signs of life (7).
The long spring (in picture 1 bottom) is for the cutting mechanism in picture 8. But there seems to be missing a support-part. So the automatic backflip of the blade is broken. :/
After some cleaning of the rubber roller, thats forwards the tape, with some isopropyl the system worked again as it should (except the autoreturn of the blade).
Author: sheepchen
making the Sony WH-1000XM4 wireless charging
I love my Sony WH-1000XM4 headset. But it bothers me that you can’t charge them wirelessly. So I wanted to change this. Here is the story:
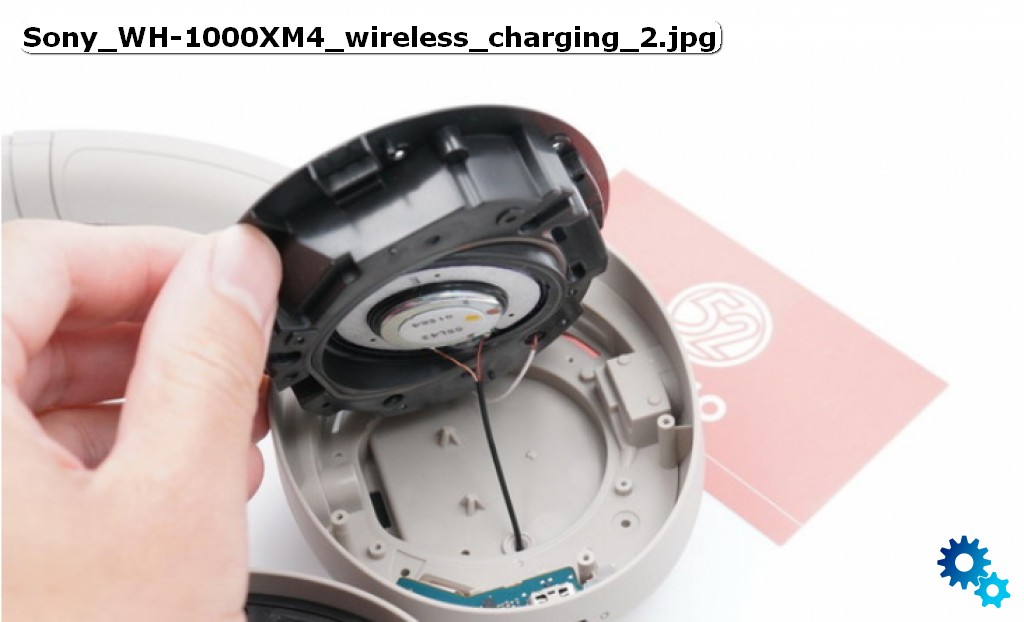
I started by opening up the headphones and located the charging-port. It’s on the right earcup on the backside.
To get to it you have to remove the cushion and the lid which holds the right speaker and a microphone. Be careful not to rip any of the fine cables. You cannot remove the lid entirely because the cables are poke through little holes and are soldered on both sides.
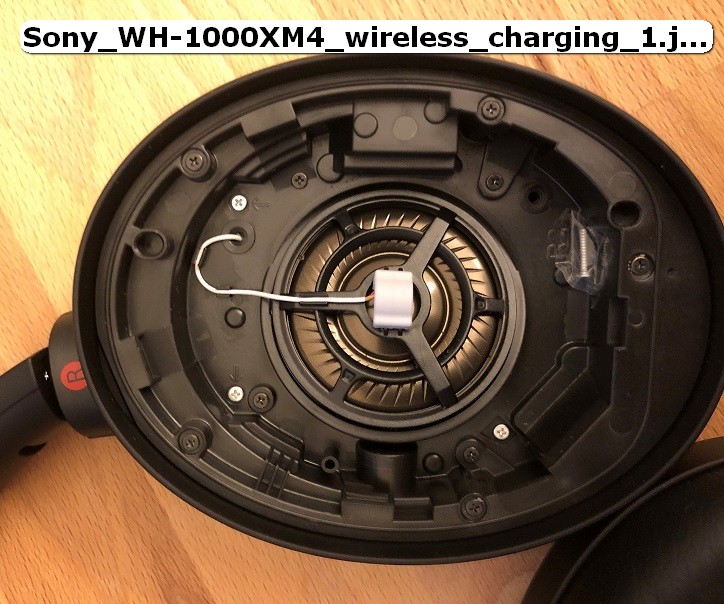
After disassembly of the lid, you can remove the cup on the backside. It was hold by the silver screws that you see in picture 1 (notice that on the picture one screw is not in its designated whole. This is because the picture is from the reassembly process – more on that later).
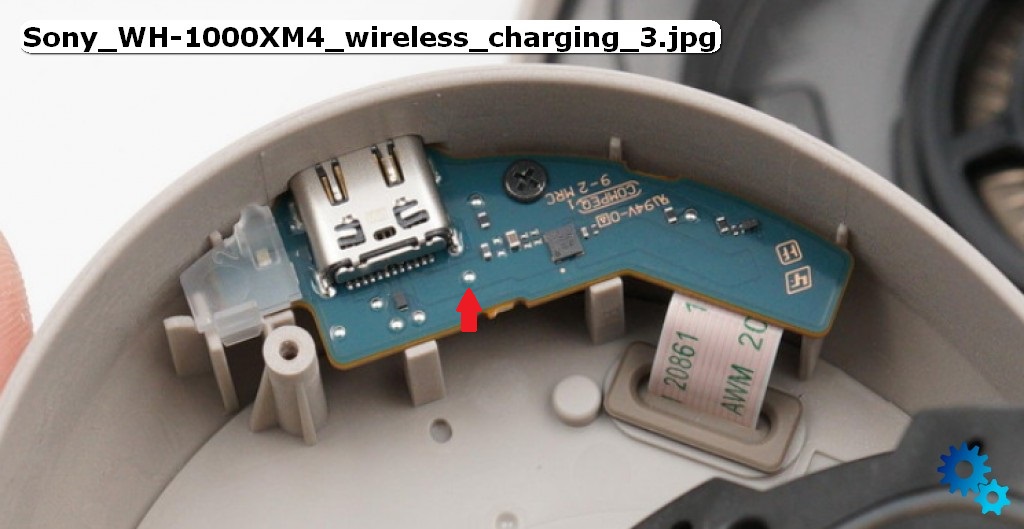
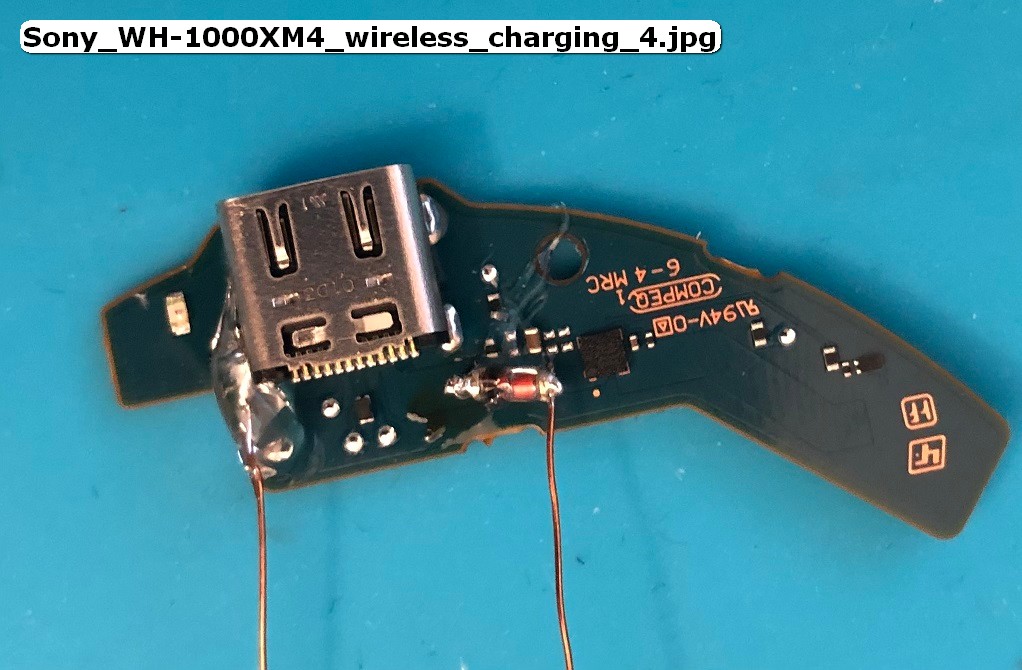
After removing the charging port (picture 3) I measured the exposed pads on the board and found the marked one to have 4.6V while charging with a 5.1V supply. I concluded that this is because of a diode voltage-drop in the chip directly south from the USB-C port. I used this entry point and added my own charging voltage here. For the desired voltage-drop I used a LL4148 100V 0.2A diode. I concluded that the wireless charge pads I used never go above 200mA (even they stated 1A charging – AliExpress-quality). I reenforced the work with some glue because the solder pads from the boards are not very good. You can see the result in picture 4.
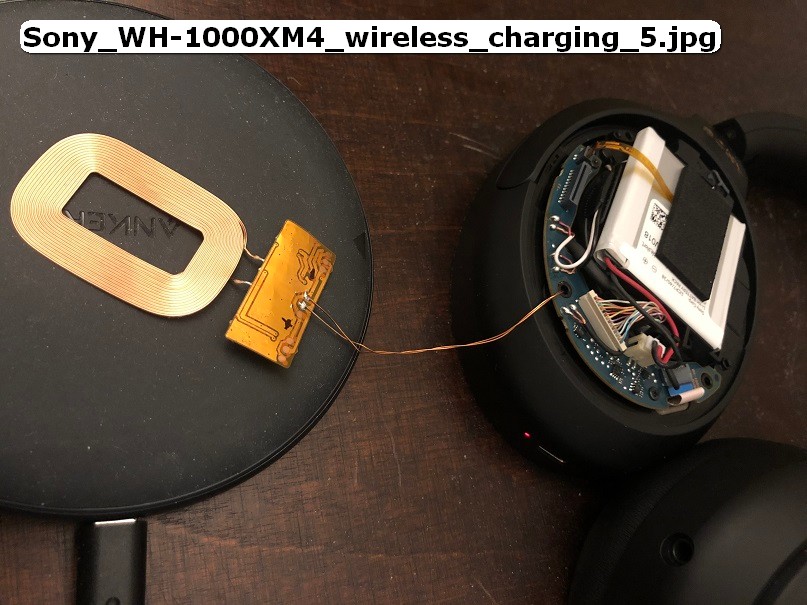
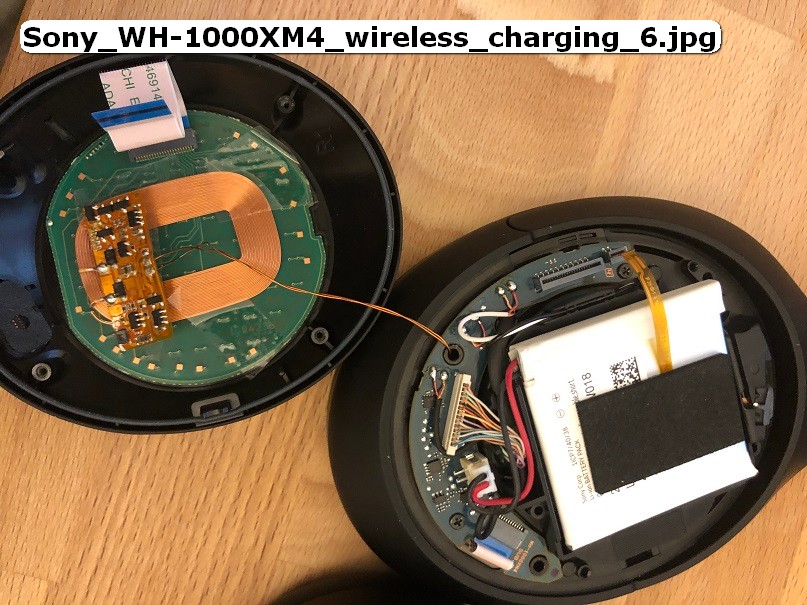
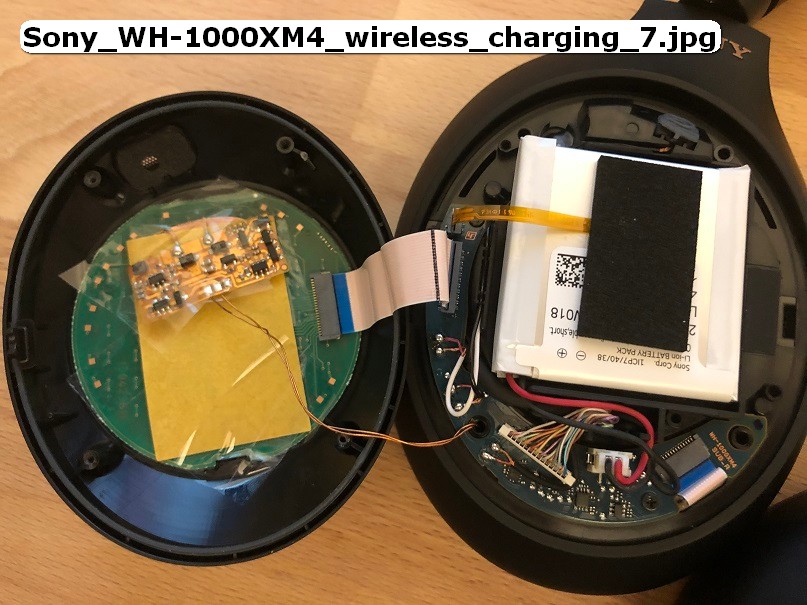
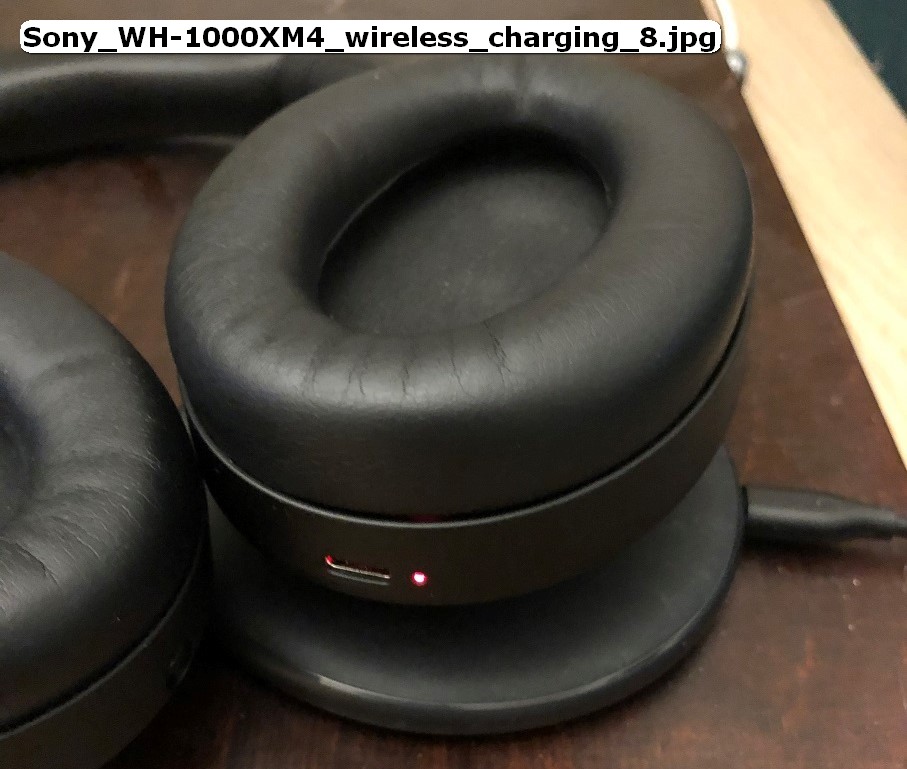
I reinstalled the charging-board and fed the cables through one of the existing screw holes to the backside oh the earcup. There I installed the cheap wireless-charging-circuit and the charging-coil. After testing it – as is – I concluded that it worked barely. I didn’t do inline-measures because it was late but the battery-voltage was raised by the circuit around 100mA while charging via USB-C and 11mA while charging via wireless (picture 5). I stuffed everything in and closed the back cup for a ‘closed test’. This didn’t work at all and I concluded that the gap between the charger-coil and the receiver-coil is too big. I taped the receiver-coil at the back of the cup (picture 6). Notice that there is a circuit-board in the back of the cup. This is for gesture- and volume-control. This will lower the power transceived even further. I hoped that the magnetic field wasn’t too blocked because of this but I was wrong. The charging doesn’t work after this so I put some foil behind the coil to strengthen its effect. This worked barely. You can see the charging-circuit starts up if I place the headphones on the wireless charge pad (picture 8). I also tested that normal charging (via USB-C) and the headphones work properly.
After this I put all together. I left out the silver screw south-east because I fed the wires through this hole.
The next day: I tried to charge my headphones this way. They were at 90%. After 1 hour they were still at 90% but the charging-led was blinking (normal it on or off). I took the headphones of the pad and noticed that the cup was very hot. The circuit shuts itself down probably due to overheating of the battery (see picture 6: the flex cable that go on top of the battery – this is a heat-sensor).
My guess is that the trickle-charging is enough to activate the charging-circuit but not enough to really charge the battery and this messes up the battery (maybe a little shorting though the circuit ?).
I have to investigate this further by charging though my ‘system’ via a bench power-supply so the circuit gets a healthy 250mA or so. And if this worked then I had to add more coil to the charging circuit. But this will be work for another time.
Links:
Pictures from the headset (white version) [here]
Pictures from the headset (black version) – my own
Software for adding labels in pictures [FastStone]
The used chargepads [AliExpress] DO NOT BUY – THEY ARE BAD
Reset password for wordpress-user
If you have forgot your password for your wordpress-instance, but you have access to the database you can set a new password!
# mysql -u <database> -p
> use <database>
> SELECT ID, user_login, user_pass FROM wp_users;
> update wp_users set user_pass = MD5('yourPassword') where ID = <userid>;
source: [Link]
Create password for /etc/shadow
Sometimes you have to create a password-hash for the shadow-file. Here is an easy way to do it:
Method 1 (better suitable for scripting – passwort is visible)
openssl passwd -6 -salt xyz yourpassMethod 2 (you enter in the PW – no clear text to see)
mkpasswd --method=SHA-512 --stdinNote:
passing -1 will generate an MD5 password, -5 a SHA256 and -6 SHA512 (recommended)
The option --method accepts md5, sha-256 and sha-512
source: [stackexchange]
Reset Asus/Sony/ACER/Samsung BIOS-Passord without CMOS Battery removal
I bought an ASUS notebook a few days ago. After careful care and preparation I had to find out that the system was protected with a BIOS password.
Removing the CMOS battery did not help because the data was stored in the non-volatile area of the BIOS.
Looking for something I found a simple solution: https://www.biosbug.com
Example for Asus:
- start the laptop and go to the password prompt
- press <ALT> + <R>
- a rescue password will show up (style: yyyy-mm-dd)
- visit the page that is mentioned above and let the side calculate a recovery password for you.
After entering this password the BIOS will be reset and all passwords will be deleted. Just save the new config. done.
Synology DS416 Slim broken / no reaction
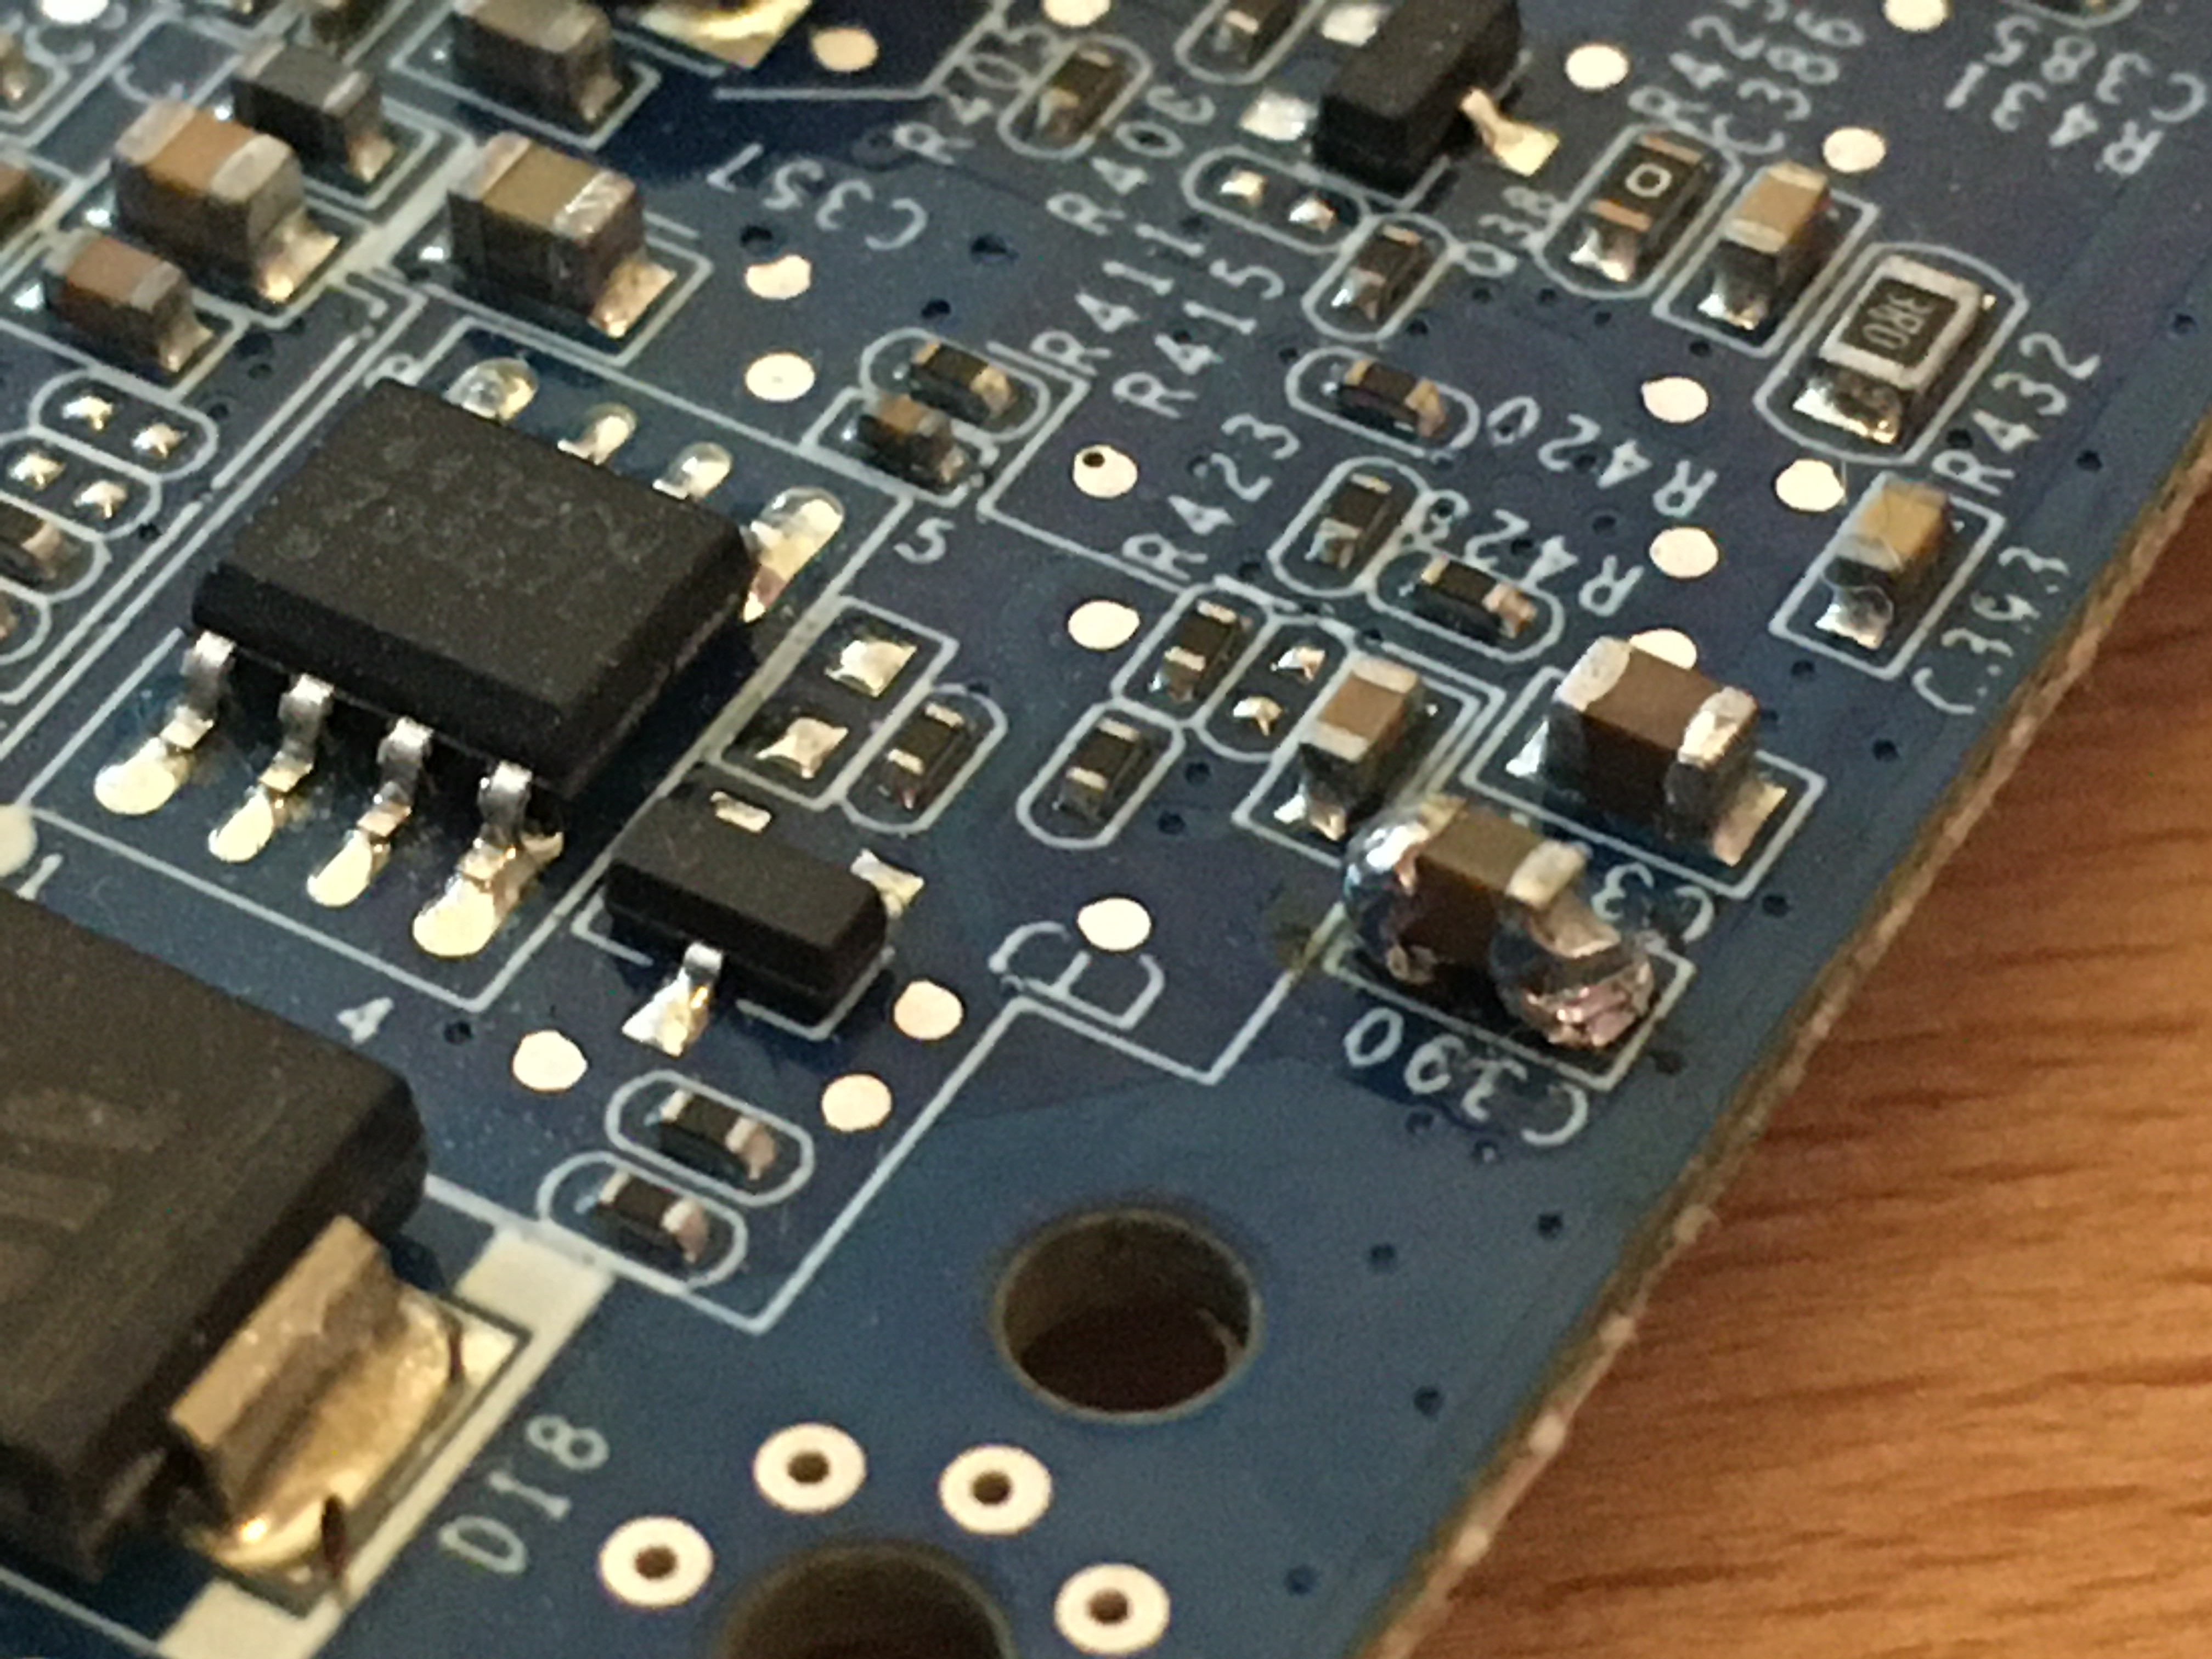
My DS416 broke. The Powersupply was okay but there was no reaction from the NAS if I switched it on. No LED or FAN. After some digging I found the cause. Capacitor C390 was shorting (get really hot). I replaced the Capacitor with an 10μF (i think). Now the NAS works like a charm (again).
(!) The Capacitor is glued to the PCB. Try not ripping pads.
The solering-job is poor because I ripped the pads and want to make sure all 3 Points (backpad, frontpad and Cap) are connected
addendum: After a couple of days the NAS stopped working again. After a fix check both caps (C390 and the cap next to it) are broken. They they seems to be in parallel. After changing both the NAS worked again.
addendum2 (month later): The next cap died. This time it was C150 – found on the underside near the power-connector.
OPNsense port forwarting (not working)
How to add a forwartingrule:
Firewall settings
Firewall -> Settings -> Advanced:
- Reflection for port forwards: Enabled
- Reflection for 1:1: Disabled
- Automatic outbound NAT for Reflection: Enabled
then save and go to Firewall -> NAT -> Port Forward -> Add
I use the example from the source here. recap:
– You have a host with IP 192.168.1.200, with port 3100 open TCP.
– You want to port forward from the outside 9999 to 3100.
- Interface: WAN
- TCP/IP Version: IPv4
- Protocol: TCP

Under Source > Advanced:

- Source / Invert: Unchecked
- Source: Any
- Source Port Range: any to any

- Destination / Invert: Unchecked
- Destination: WAN address
- Destination Port range: (other) 9999 to (other) 9999

- Redirect target IP: 192.168.1.200
- Redirect target Port: (other) 3100

- Pool Options: Default
- NAT reflection: Enable
- Filter rule association: Rule NAT
Now it should work! But if it doesn’t (in my case) try the following:
from external: telnet <your external IP> 9999
from internal: telnet <your external IP> 9999
Does the call from external not work, but from internal it does? Then look in the livelog if the query even get to your firewall: Firewall -> Log Files -> Live View
If the query doesn’t show up maybe the error is before the firewall. In my case it was a NAT in the Fritzbox (even I have a external IP). I had to set the “exposed host” rule in the router. This is nessesary by newer Fritzbox models (in my case 6591 Cable).
source: [theogravity] [me]
Fixing the Character Encoding in WordPress
Open the wp-config.php or etc/wordpress/<site>.php file in a text editor such as notepad and fiddle around with this settings:
define('DB_CHARSET', 'utf8');
define('DB_COLLATE', '');
source: tipsandtricks-hq.com
How to export/import MySQL database with exact character set?
mysqldump -uUSERNAME -pPASSWORD --default-character-set=utf8 DATABASE > backup.sqlWhen you import backup into an empty MySQL database, you can set the exact character set for the data that will be inserted. To do this, use the following command:
mysql -uUSERNAME -pPASSWORD --default-character-set=utf8 DATABASE < backup.sqlReplace –default-character-set=utf8 with the charset used for the creation of the backup.sql file. This will ensure that your data is inserted correctly.
character-set UTF8 vs UTF8MB4
MySQL utf8 is a propiatary standard from MySQL which does not reflect the real utf-8 standard. It uses only max. 3 bytes for a character. If you want to use real utf8 in your database you should use utf8mb4.
source: siteground.com, hydroxi.de
ASUS PCE-AC88 better driver from Broadcom
The ASUS PCE-AC88 is a strong and powerfull card with a little flaw:
The driverpackage that Asus provides is Version 2.8.0.7Â from 2018/04/13 [link]
The driver in this package is version 1.558.48.8 from 2016/09/06
The device-name im device-manager with this driver is “ASUS PCIE-AC88 802-11ac Network Adapter”
My Windows 10 (newest patch 2020/04/20) crashes randomly with this driver whenever the system is under heavy load (any heavy load, not only networking).
After some searching I found the Chip which this card uses. It is the Broadcom BCM4356 and I found a newer driver for this chip.
Because I hate installationpackages I repacked the driver so you can install it without bloadware
Broadcom BCM4356 Wireless LAN Driver (works for ASUS PCE-AC88): [link]
This driver had version 1.558.53.1 from 2017/10/22
After installation the device is not longer an “ASUS”. Now the device-manager sees it as “Broadcom 802.11ac Wireless PCIE Full Dongle Adapter”.
With this driver for me all crashes are gone!


