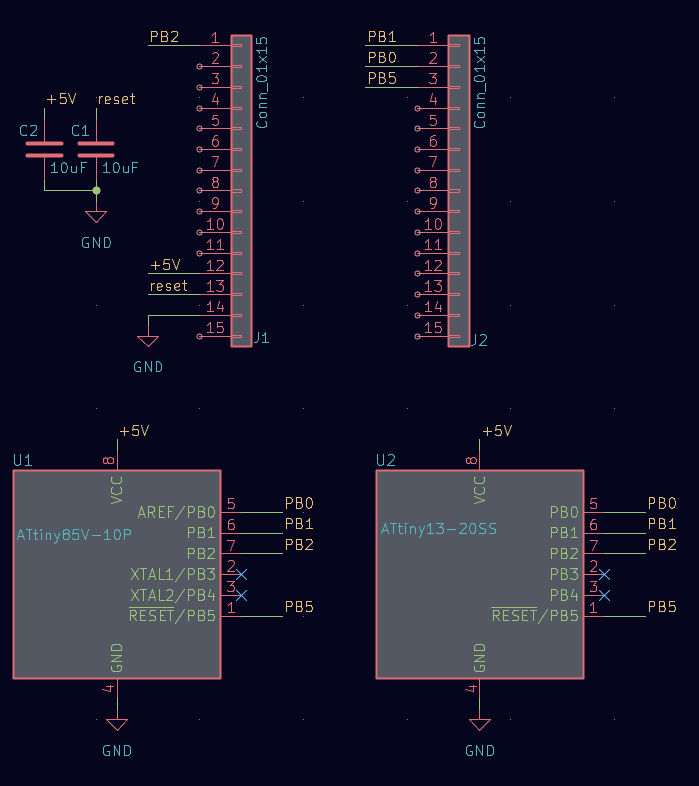
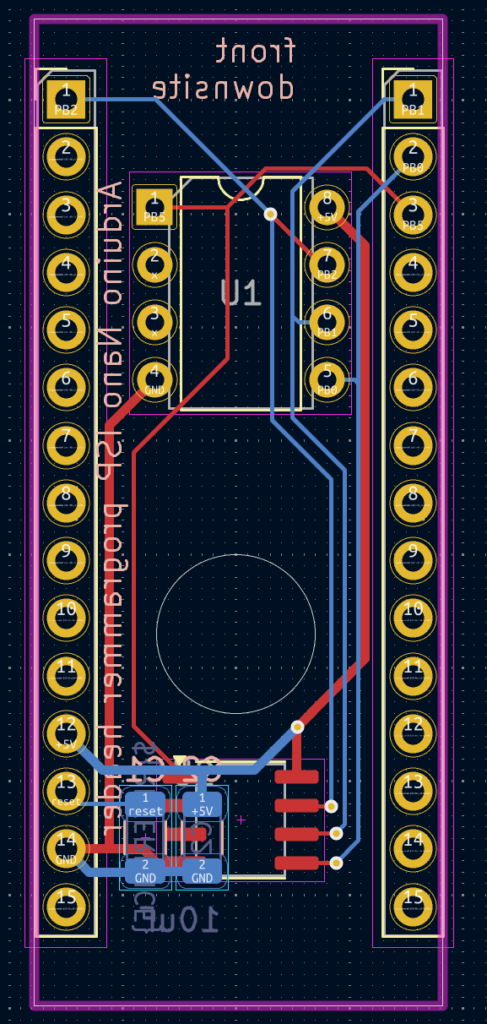
I created an Arduino Nano header so I don’t have to recable a nano every time I want to burn or programm a Tiny. This board comes on top of the Nano like a sandwitch.
TBD – photo of endproduct TBD – video of programming and Test
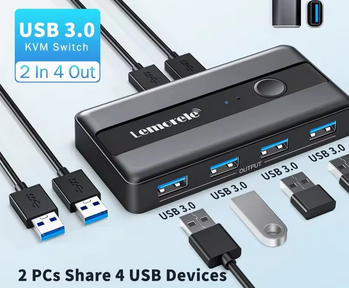
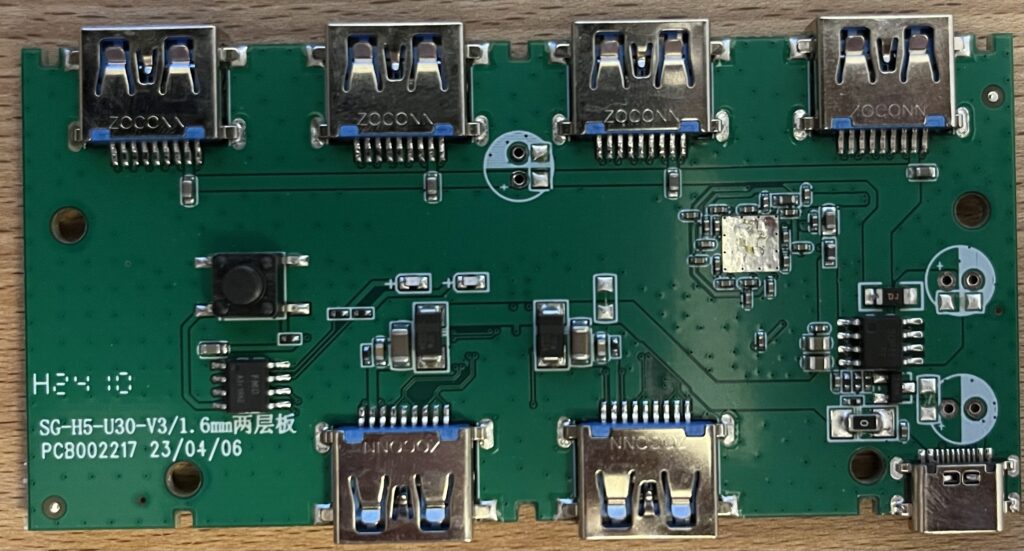
USB KVM Switch Adapter USB 3.0 Switcher 2 inputs 4 outputs
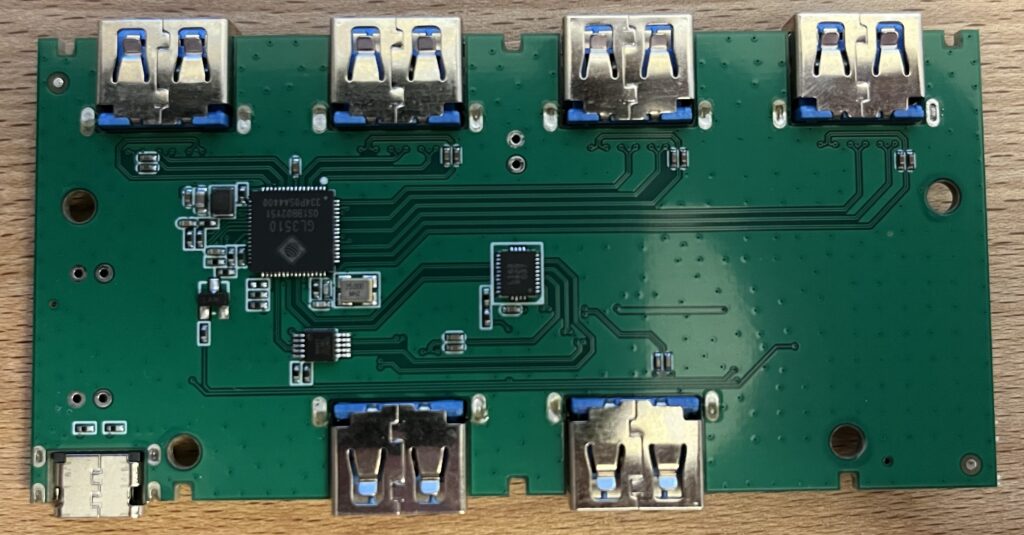
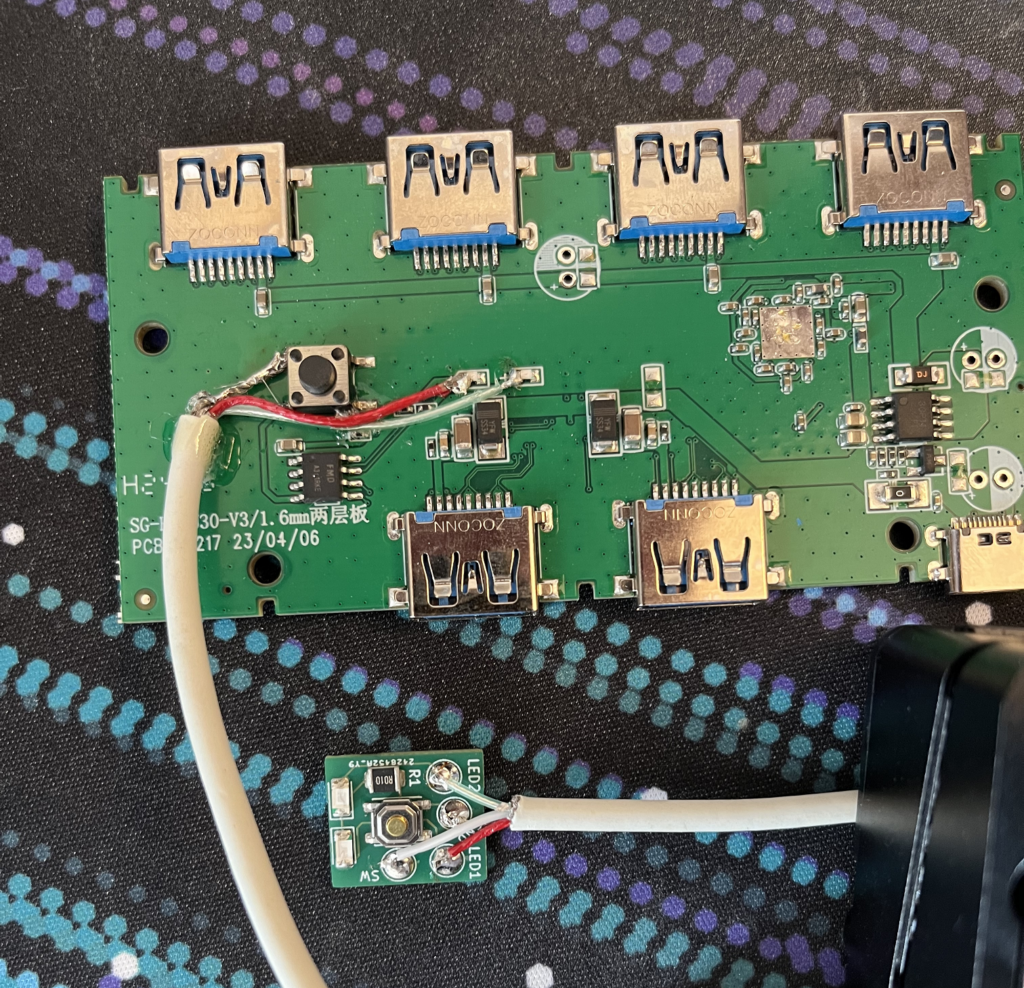
This is a 2 Input 4 Output USB3 switch. With the button on the top the switch toggles a little USB3 switch chip (downsite in the middle) between two host devices (PCs). The output of the switch chip is then connected to an USB3 hub-chip (bottom site left side) wich connects to the top 4 usb ports.
Because I have on-call duty on many weekends I want to switch my USB devices (mouse, keyboard, microphone, usb-soundcard) via one button press between my home PC and my work PC. But the USB hub is neadly tucked away down behind the PCs. So I have to crawl unter the table and press the button on the hub every time I want to switch PCs (which is multiple times â day).
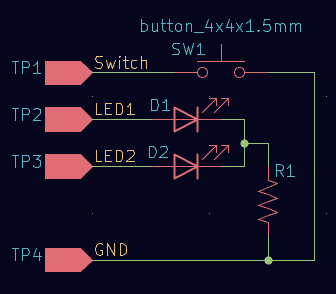
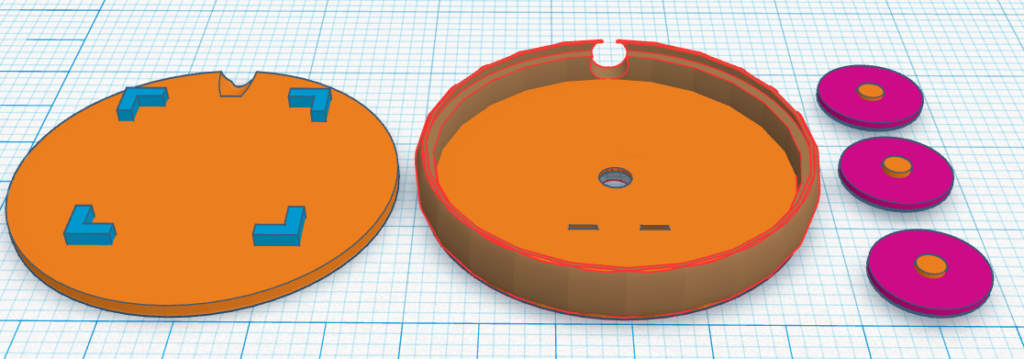
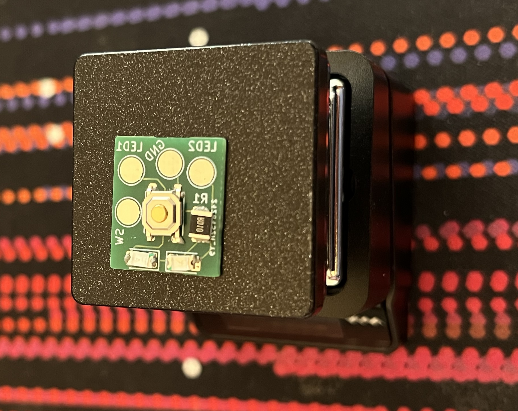
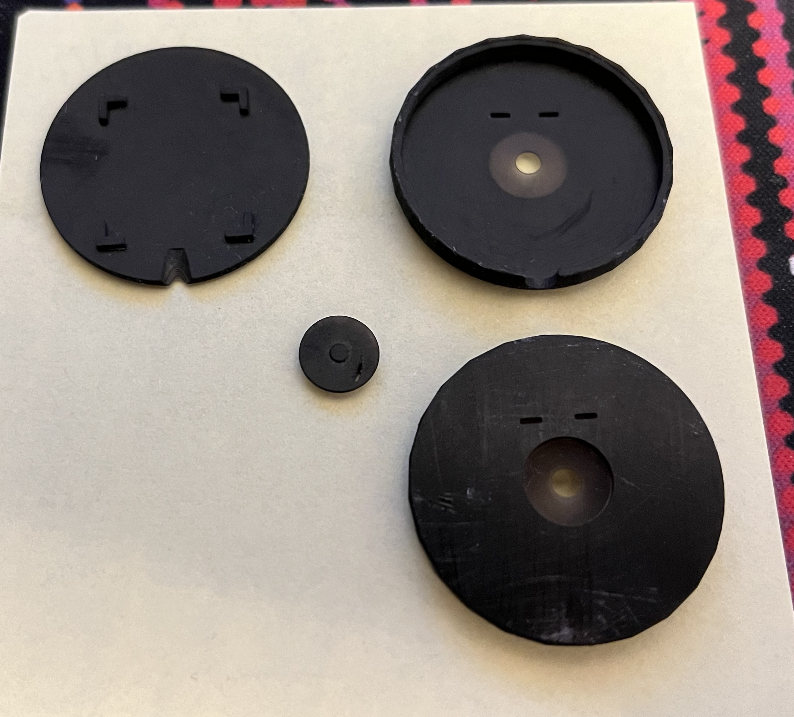
So the idea is to breakout the board and LEDs from this hub to a daughterboard that is mounted within easy reach from my sitting position at my desk.
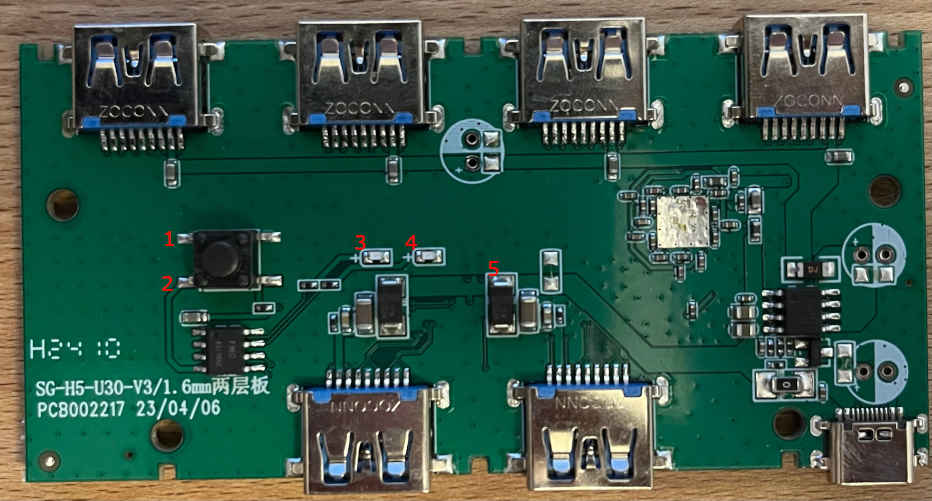
So lets analyse the hub!
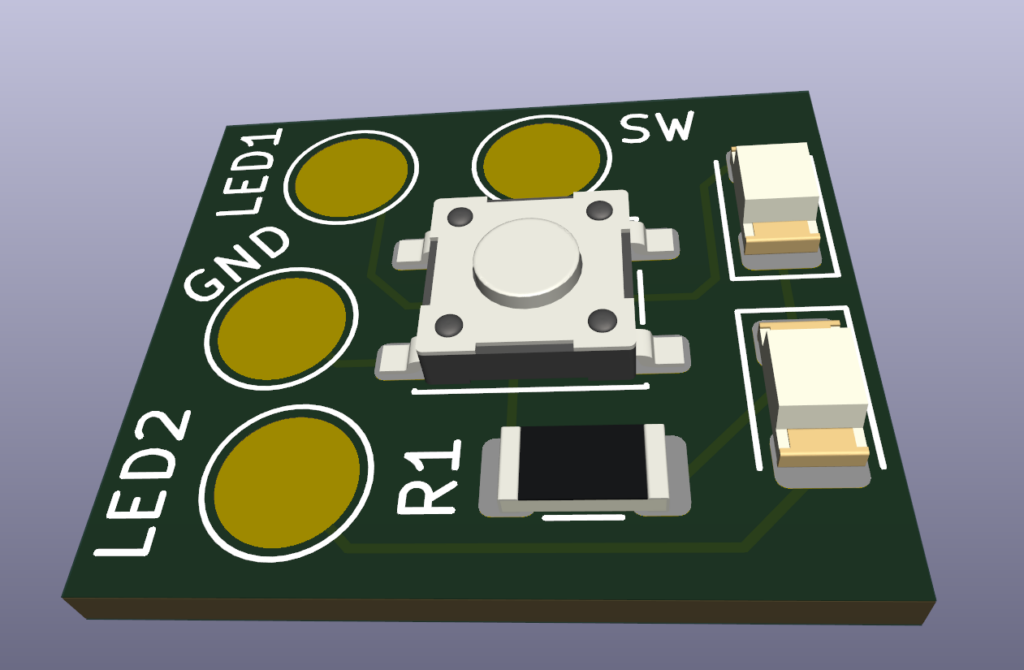
GND
switch (_active)
LED1 (GND=off/2.7V=on)
LED2 (GND=off/2.7V=on)
VCC 5V
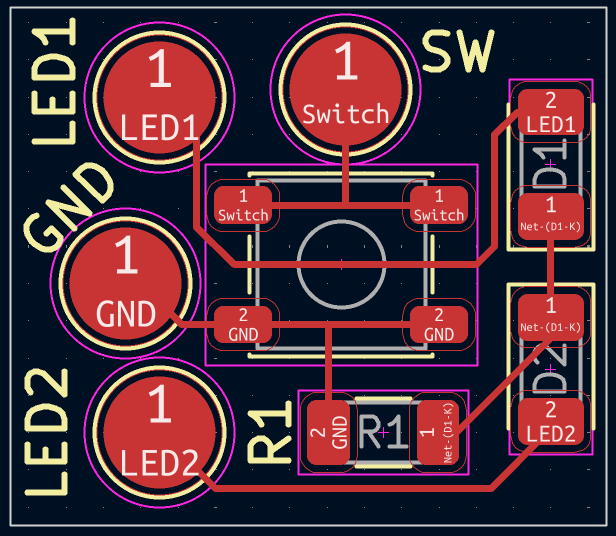
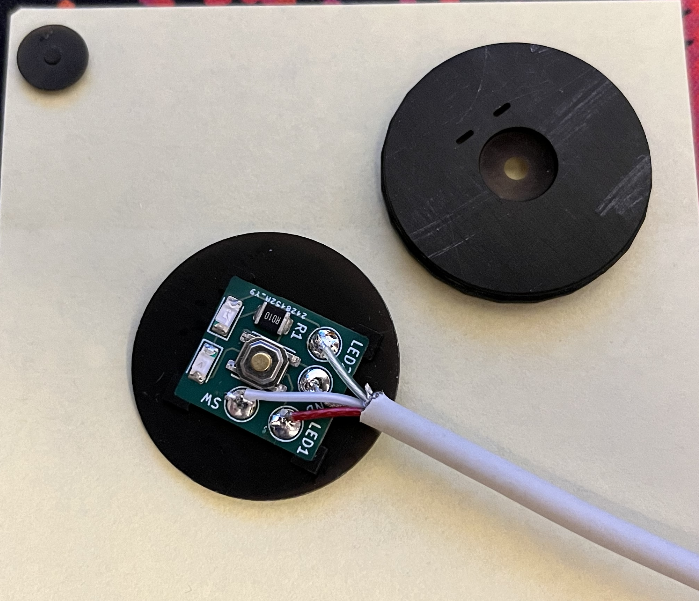
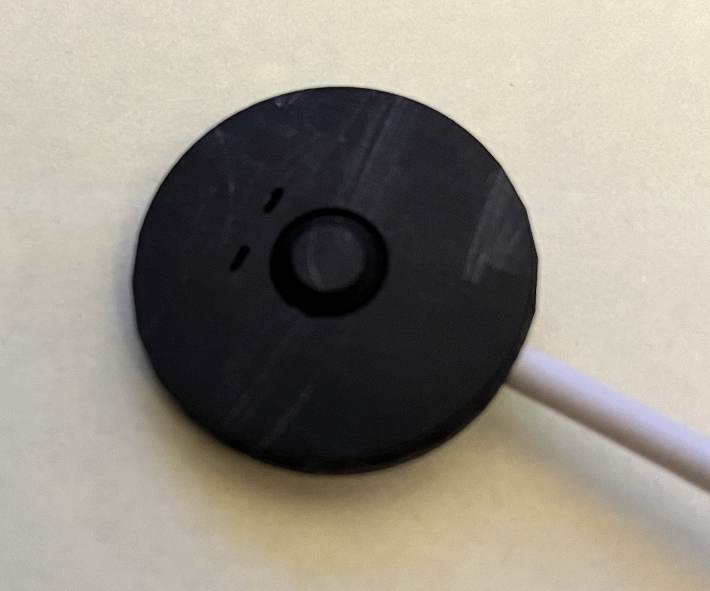
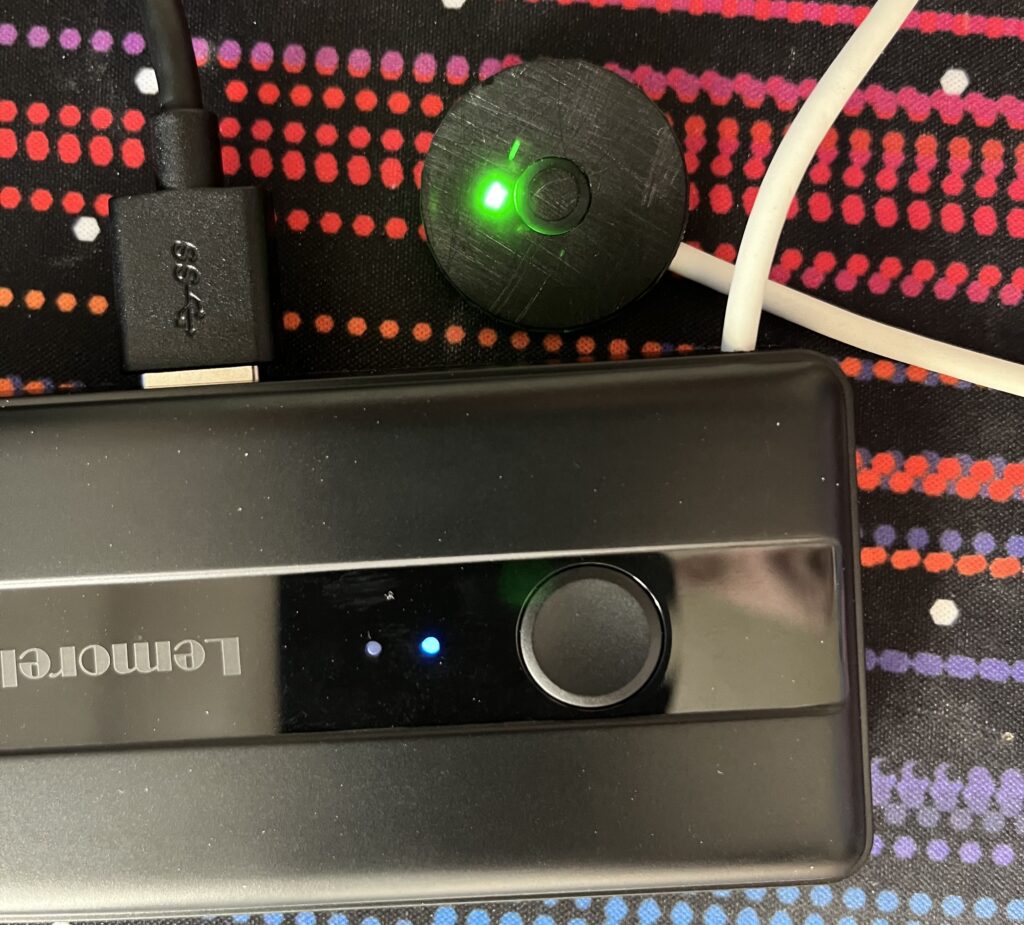
Easy! create PCB and housing and we are good to go!
Disclaimer: Version 1 does not work! Version 2 is the ‘good’ one. for record sessions over 1 minute the AMS1117 regulator gets to hot and shuts off. —
The Problem
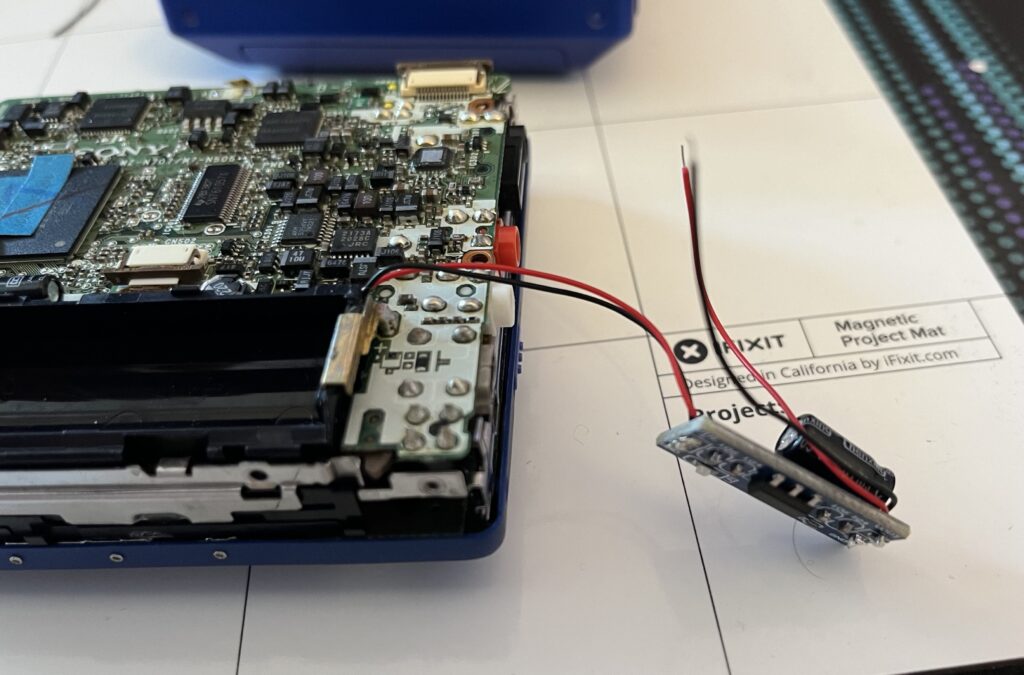
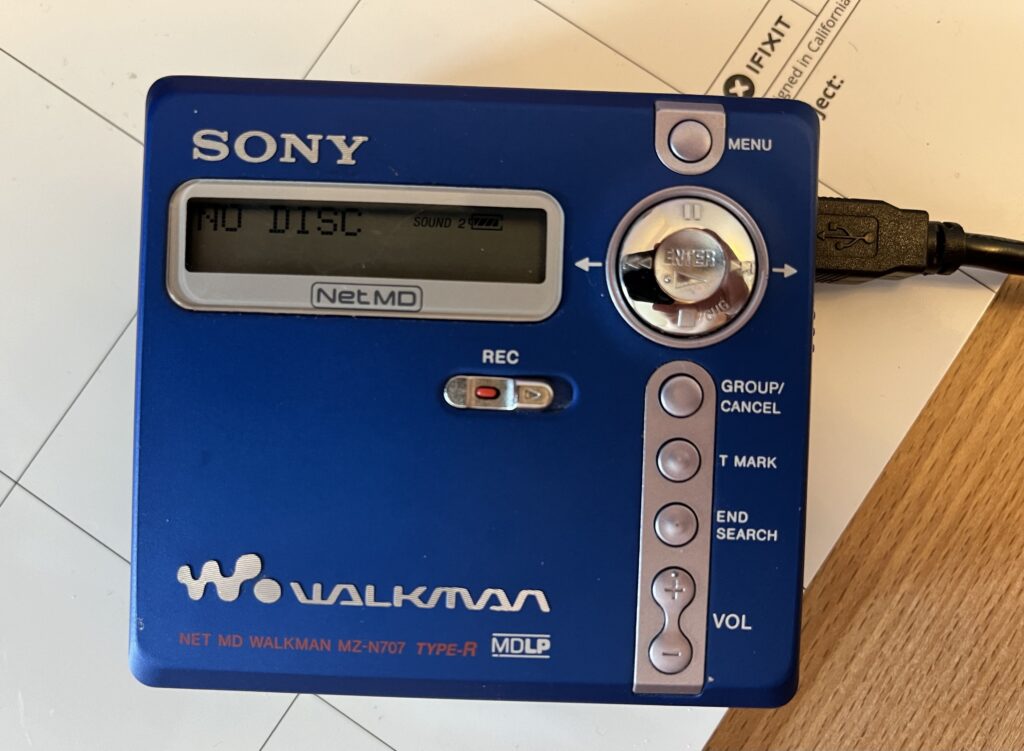
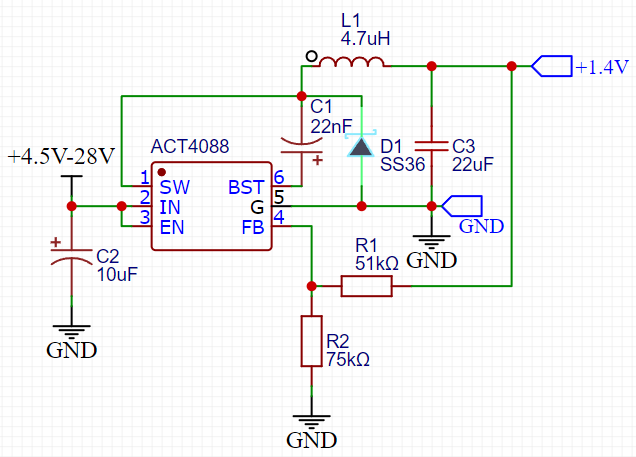
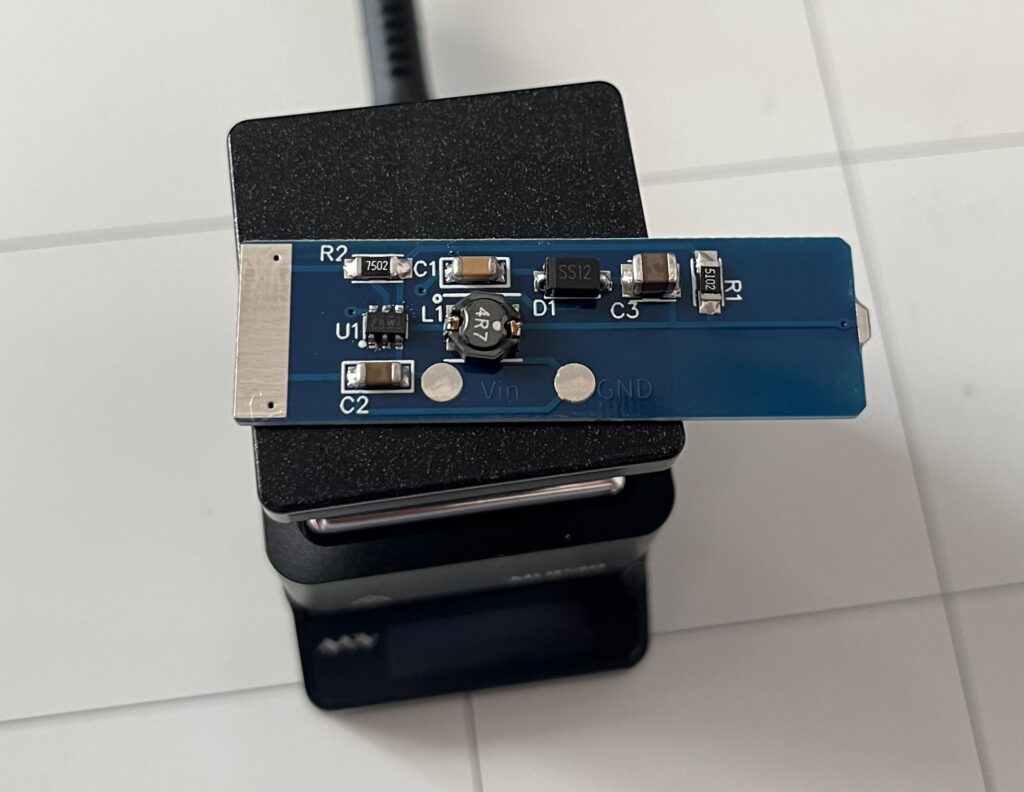
If you want to record an MD with the Sony MZ-N707 you have to plug in the mini usb cable and have an AA-battery inside of it. I reworked the player, so it takes the power from the USB and converts it to 1.5V to mimic a fully chared battery.
I decided on 1.5V instead of 1.2V (more headrum if the voltage spikes) because the motor in the player can draw 220mAh for a few seconds even @1.5V. Do reduce the strain on the thin wires I used I opted for the upper end of the Voltage-curve.
Version 1: off the shelf Voltage regulator (not good)
Here is what I used:
Sony MZ-N707 Player
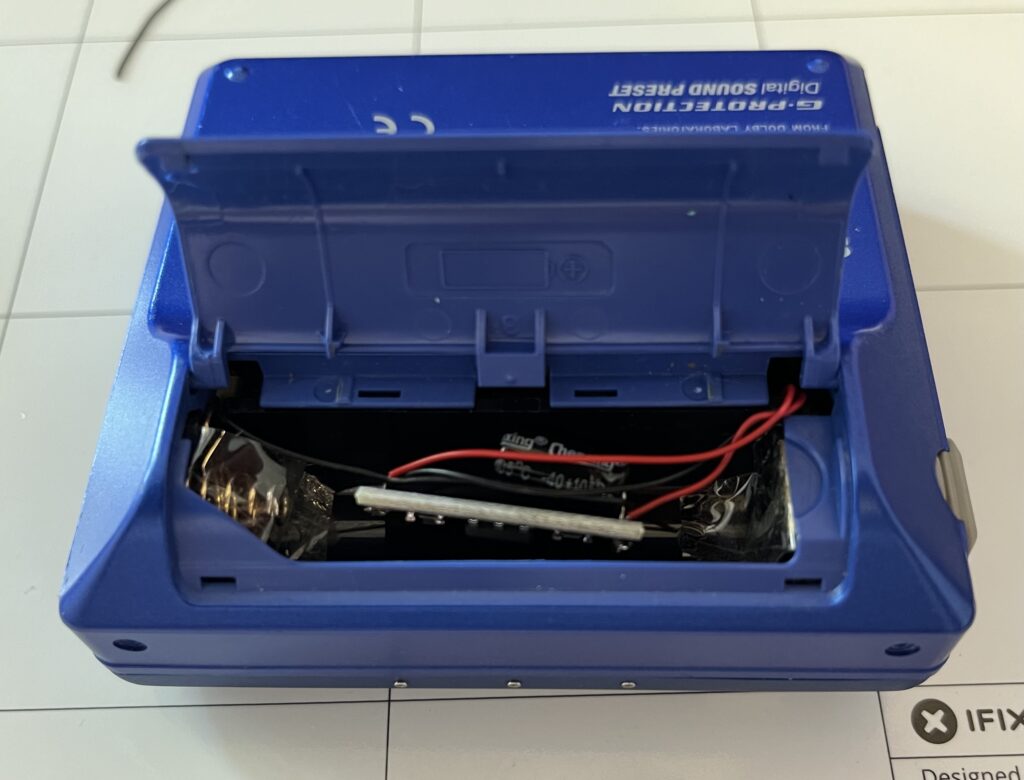
1.5V regulator (on board from aliextress)
Capacitor 16V 220μF Cap (for more stable rail while surgedraw)
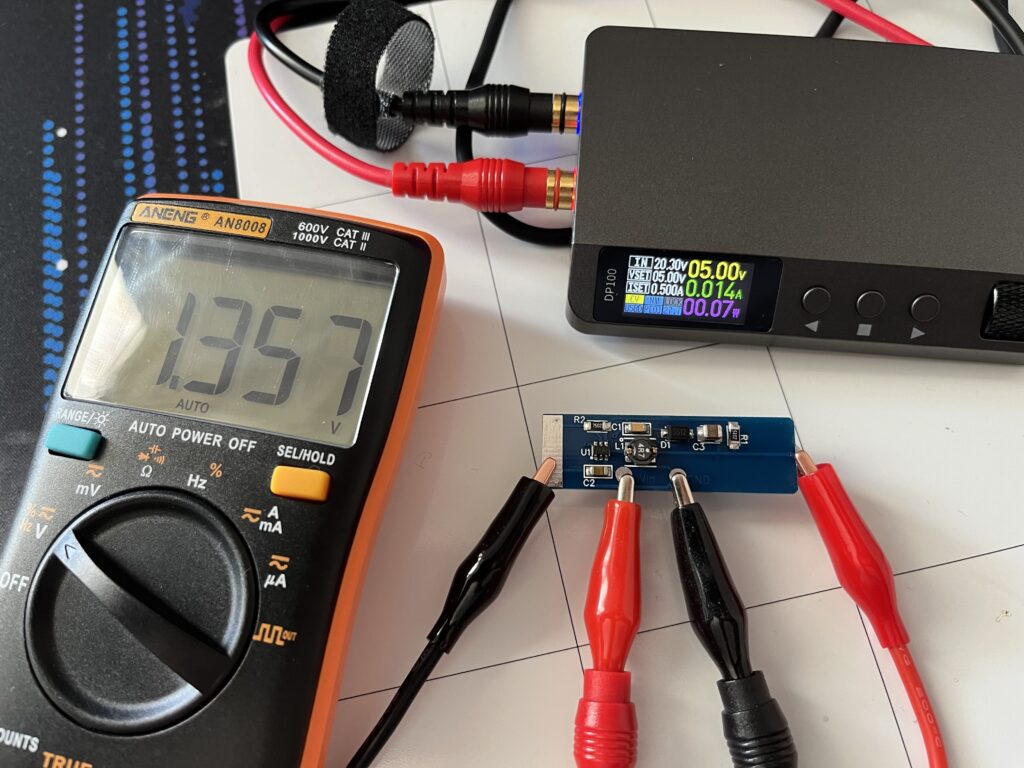
As mentioned in the disclaimer this did not work very good. Thats the reason for version 2!
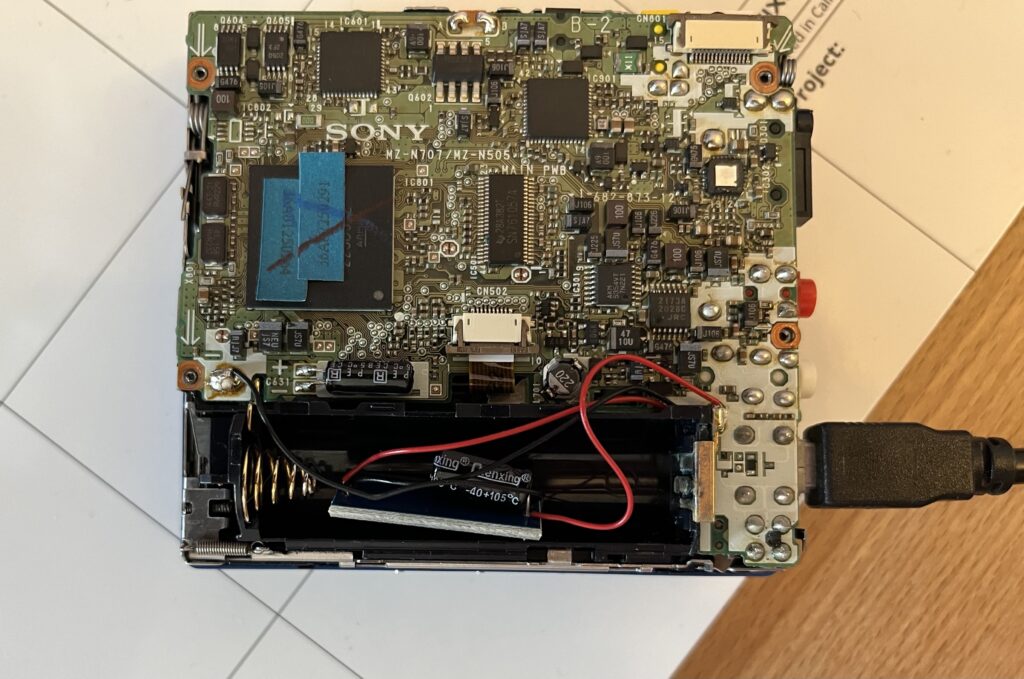
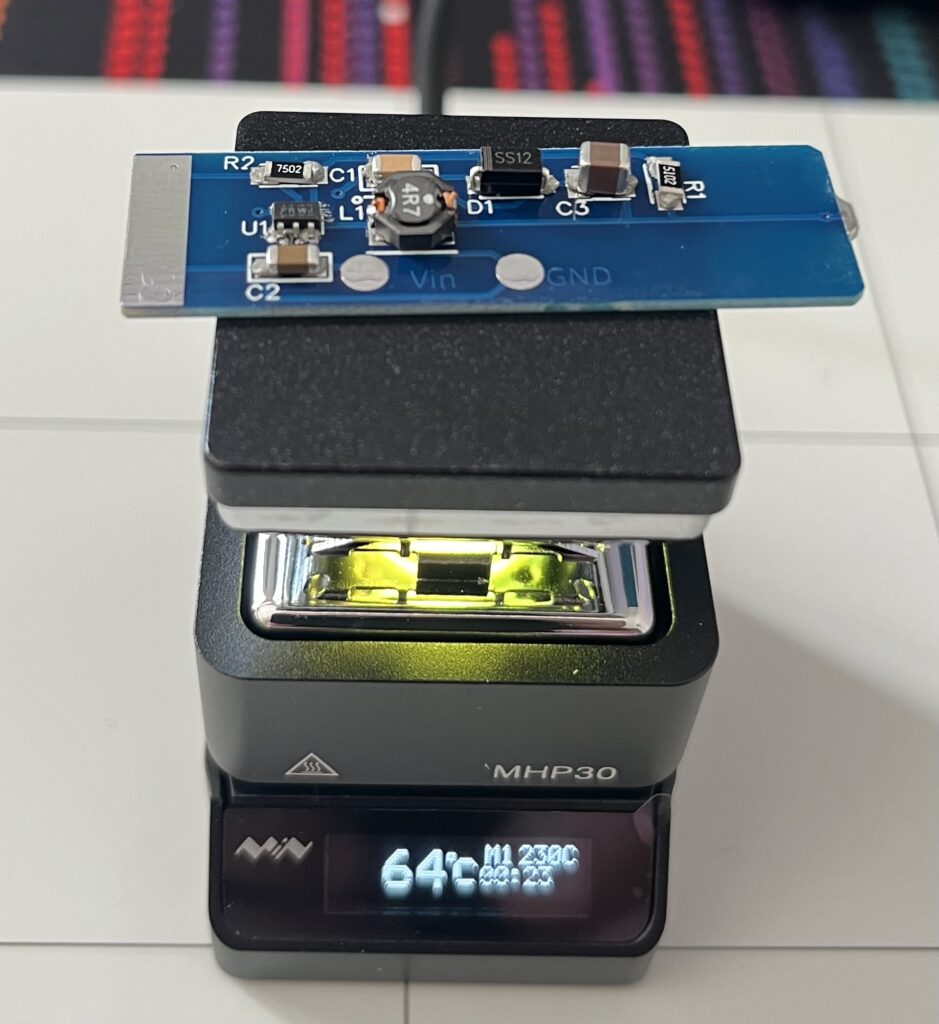
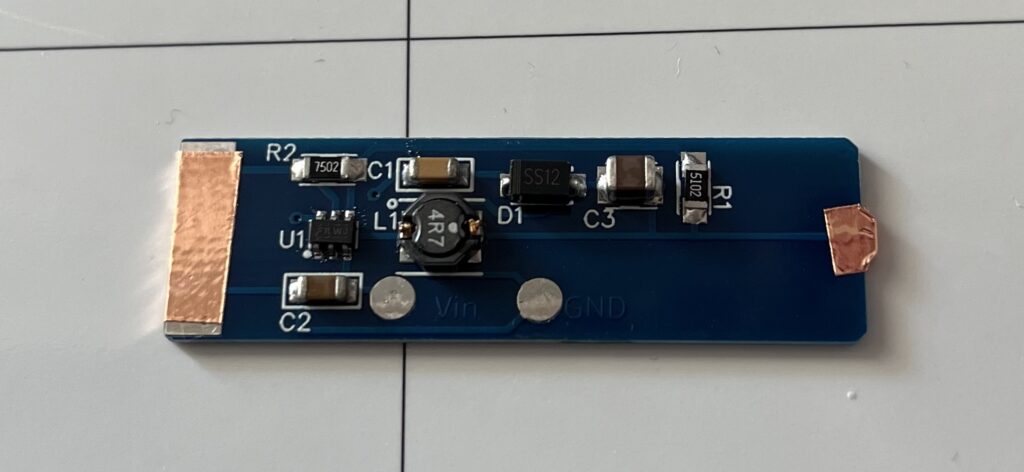
After soldering and testing it turns out that the contact via copper tape is not good enough. So I had to add wires back to the device. But with this done it wored flawlessly.
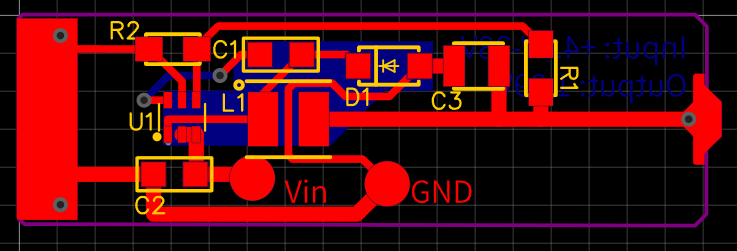
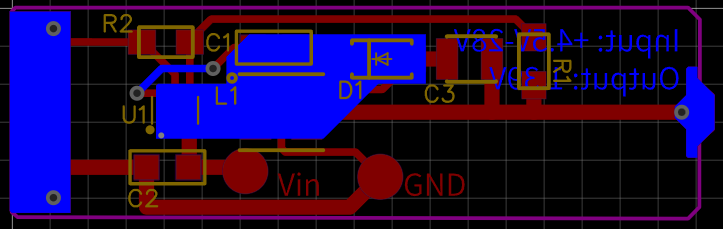
The Gerber in this article is a bit newer than the one I soldered, but its just bigger traces for the second DC site for better voltage stability on surgespikes. Technically they are the same.
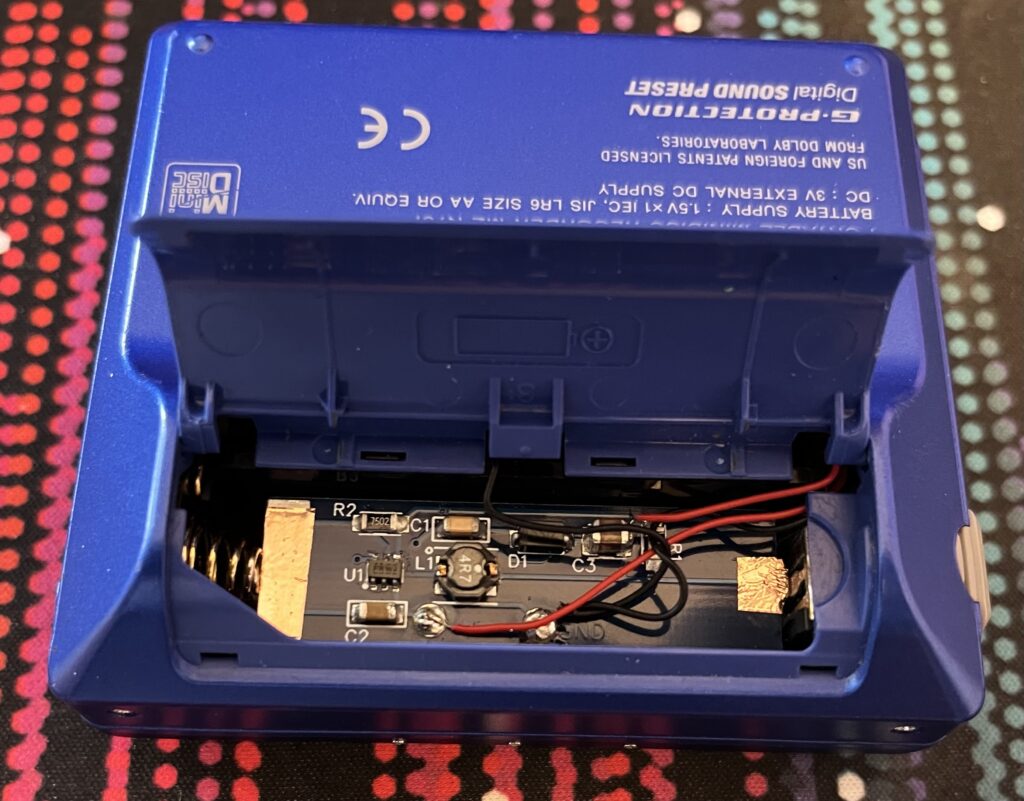
With the new board in place I recorded a full MD without any drops.
I use an ASRock B550 Extreme 4 motherboard in combination with an active USB-Switch with 2 PC-connections (ABLEWE USB Switch 3.0, 4 Ports USB). I have connected the USB-Hub to the top USB-Ports of my Motherboard because my microphone (Rode NT-USB mini) won’t work on the other ports properly (robotic voice after a few seconds). Power to the USB Ports while the PC is offline is switched off in the Bios (v1.8).
The Problem was that even the PC is switched off the USB hub rapidly flashes the input-device light for this port. The laptop that is on the other port won’t get through its BIOS while the PC is connected to the switch.
My suspicion: The switch uses mosfets to detect if the PC on any output is turned on and the B550 board puts a voltage on the port that’s just enough to turn the mosfet on. Then the current will be dumped though the hub and the mosfet turns off again. The board then charges up the capacitor on the USB output until the turn-on voltage of the mosfet in the hub is reached and the cycle continues. The hub meanwhile tries to connect to input 1, can’t and switches back to input 2. And this multiple times a second. No wonder the BIOS from the second PC (Lenovo Laptop) hangs.
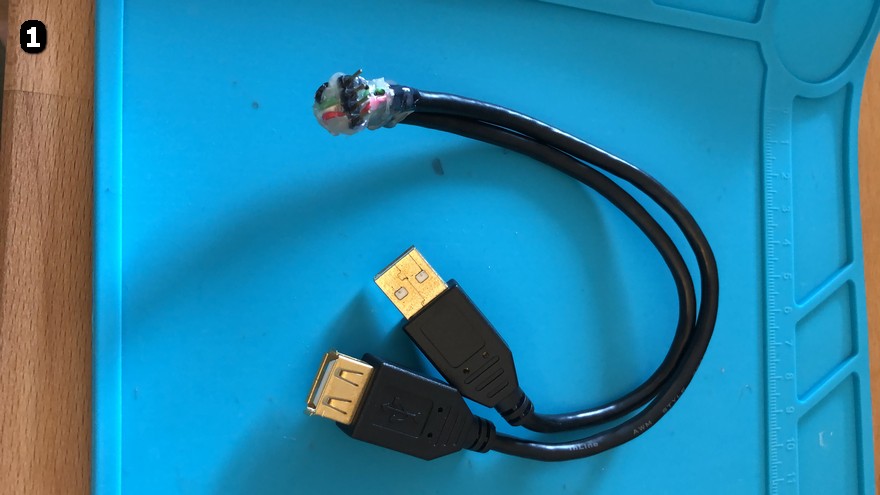
How to check: I build a breakout-cable that I put between the motherboard and the hub and measured it. There were 1.641V on the USB-line even it should be (near) 0! (The voltage was there even when I had the hub removed)
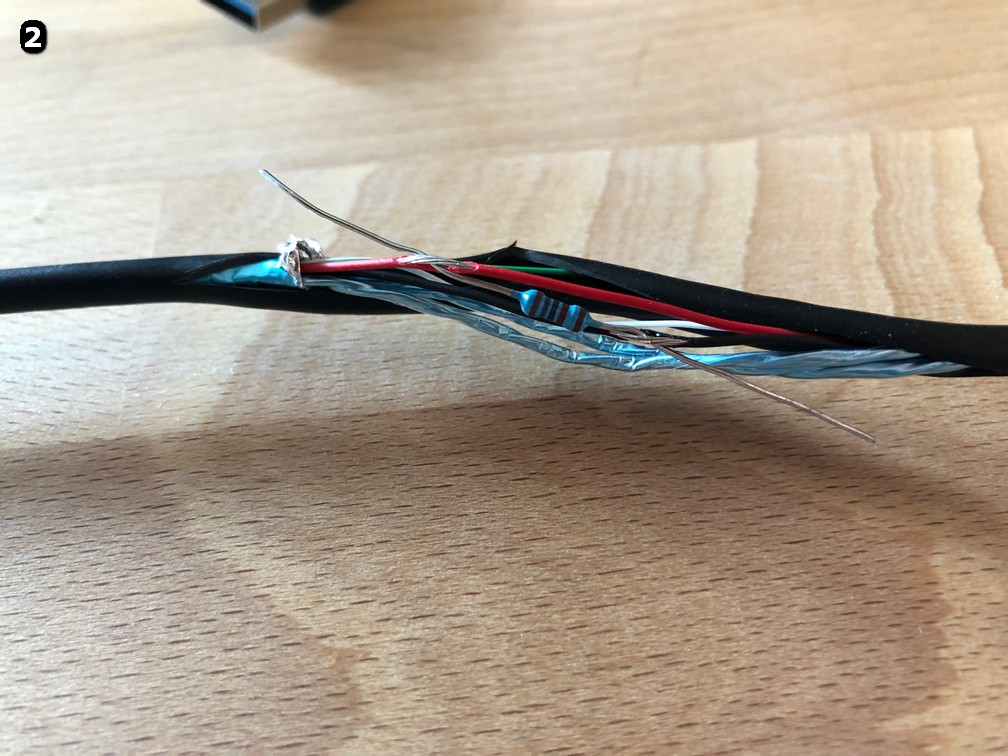
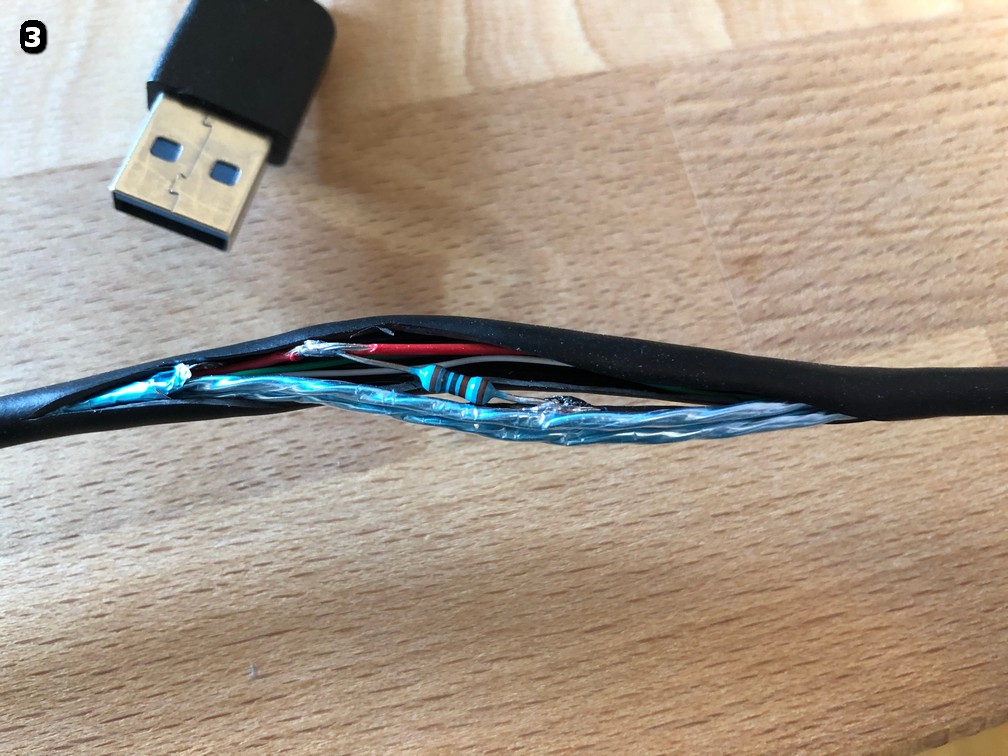
After this I calculated which minimum resistor I need, to drop the voltage below the activation-voltage from the USB hub.
Consideration: – The cable must work when the PC is turned on (5V). – the value should be as high as possible because 1. so it stays cold, 2. the voltage drop while the PC is on is as low as possible and 3. the power consumption is as low as possible.
resistor-rating = 0.25W 0.25W / 5V = 0.05A (MAX continuous amp through resistor – we want to keep it way under this) 5V / 0.05A = 100 Ohm (absolute minimum resistor-value for continuous usage)
I tested 220 Ohm, 1k, 2k and 10k. The 10k ohm wasn’t enough ‘current dumping capacity’ to work. But I saw a significant slowdown between ‘activations’ on the hub. The 2k ohm resistor works most of the time but every few tens of seconds I saw a short blinking of the USB hub trying to make a connection.
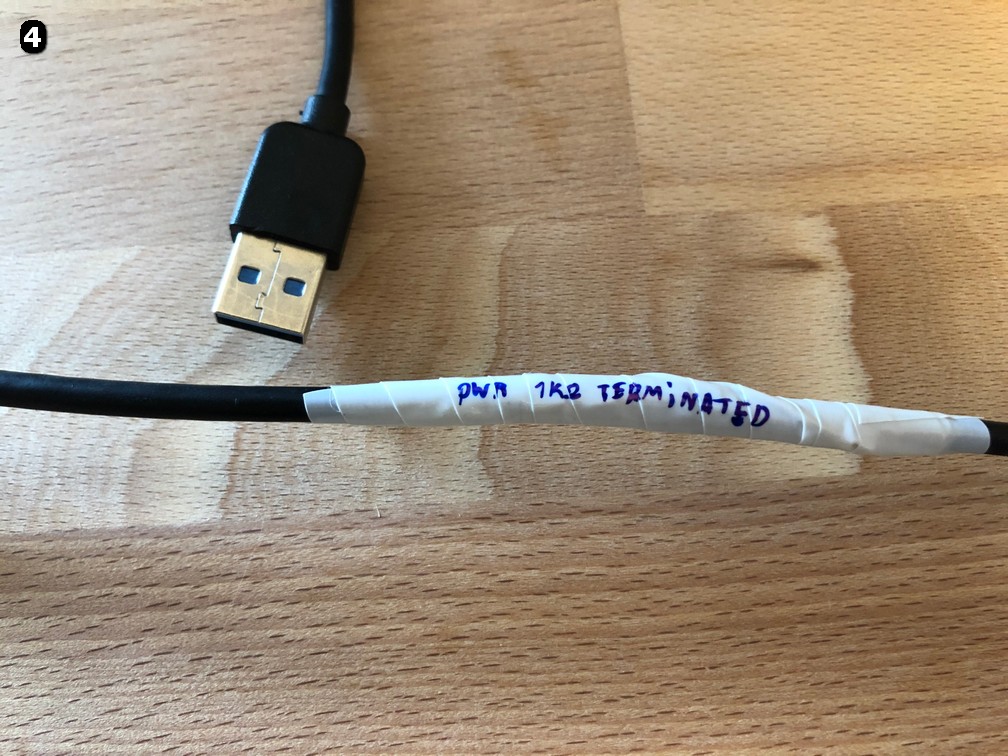
So I settled for a 1k ohm resistor to be safe. It works well within specs (1/10 of it) and should do the job just nice. cont. A through resistor while PC is on: 5V / 1000 ohm = 5mA => 25mW cont. A through resistor while PC is off: 1.641V / 1000 ohm = 1.6mA => 8.2mW
PC on: 1.82€ / year PC off: 0.63€ / year (The cost is in the middle of these 2 values – depending on the running time of the PC)
The cable worked like a charm. It would be nice if the ASRock board hadn’t this flaw in the first place.
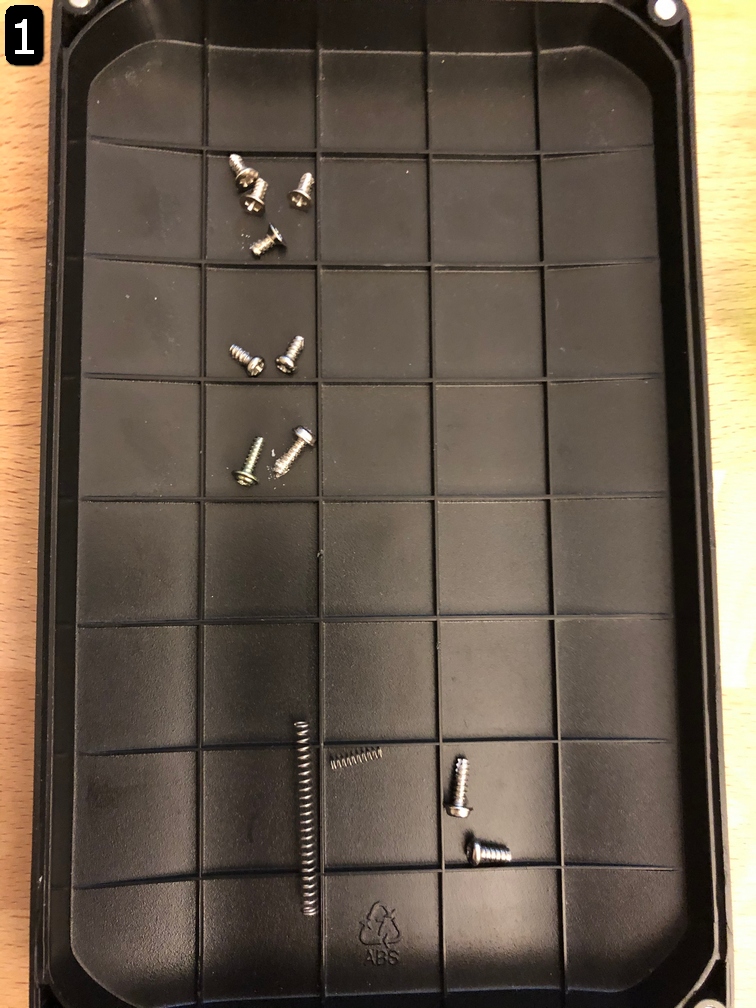
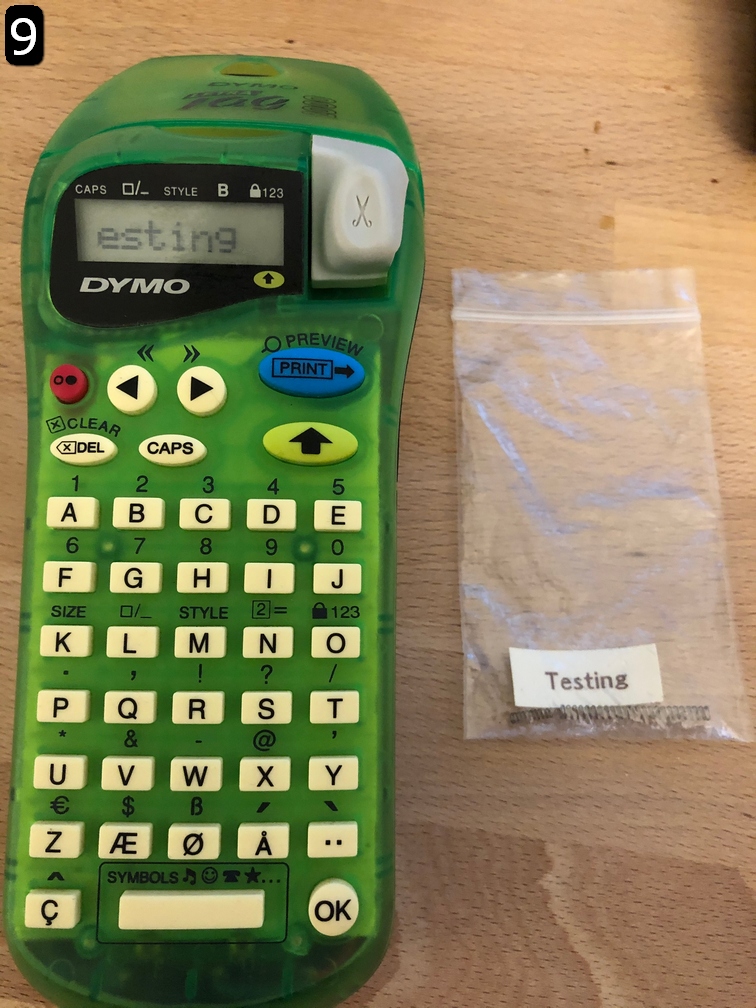
A friend of mine send me her broken Dymo labelprinter. The descriped fault was “not turning on”. While I opend up the unit screws and springs fell out – nice start. somebody was here before.
On picture 1 you can see the screws I had removed (top) and the things that fell out on its own (bottom).
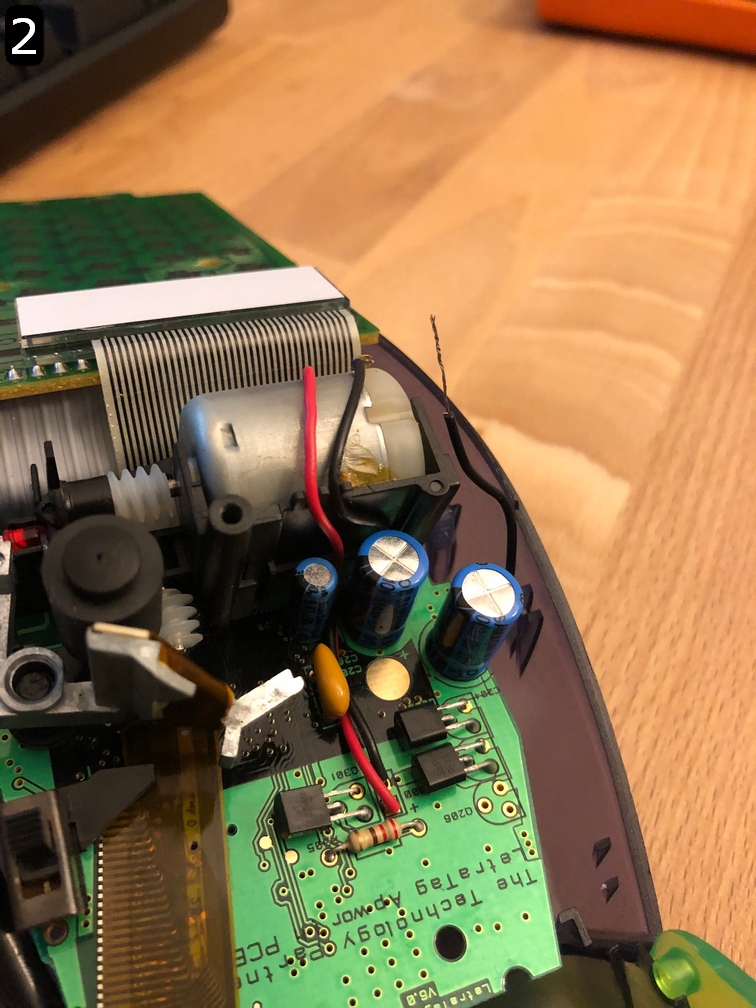
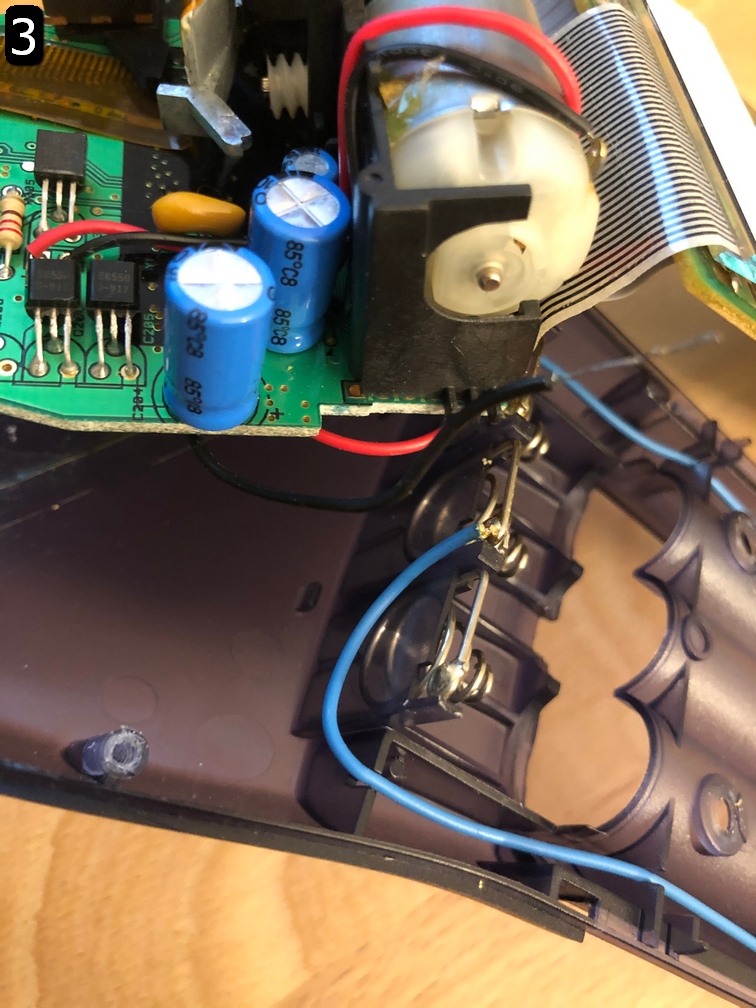
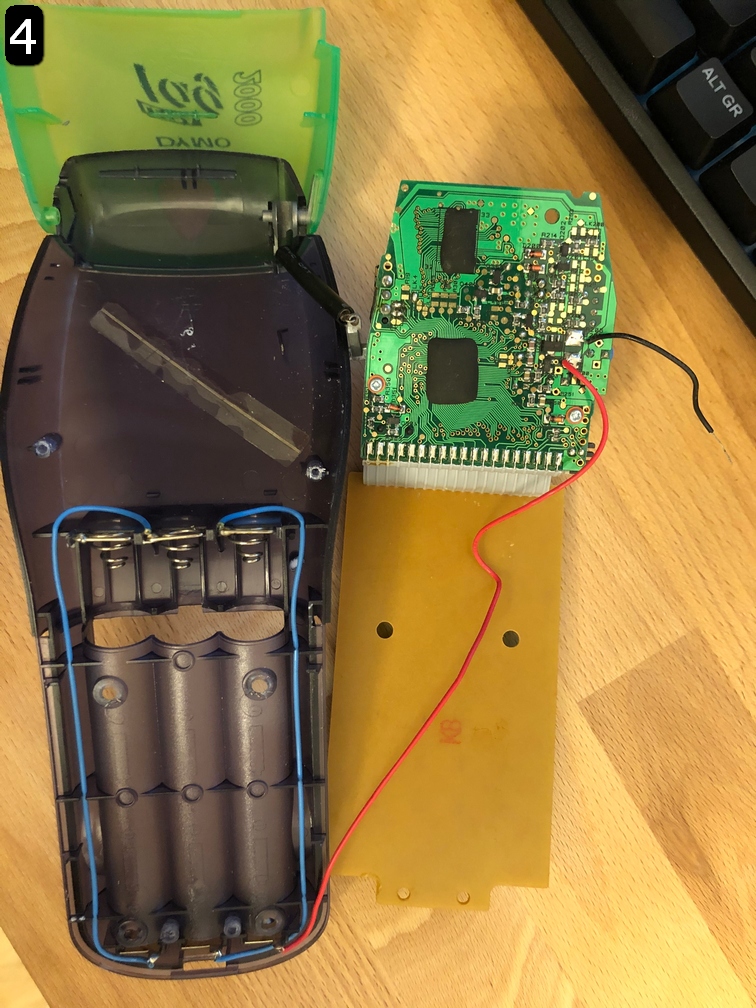
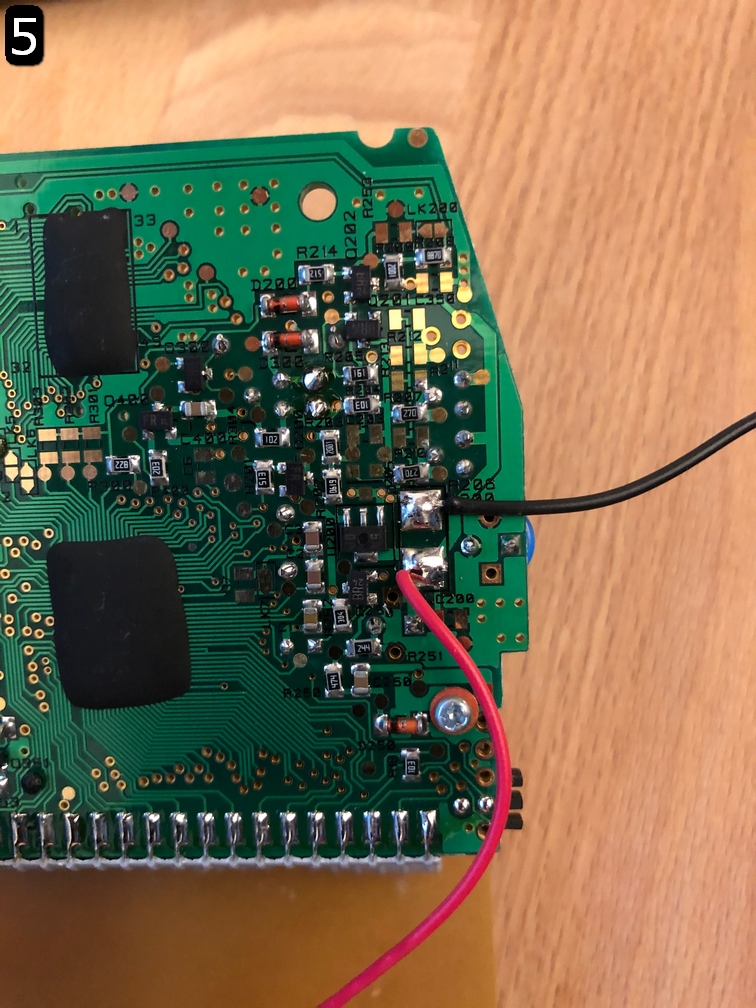
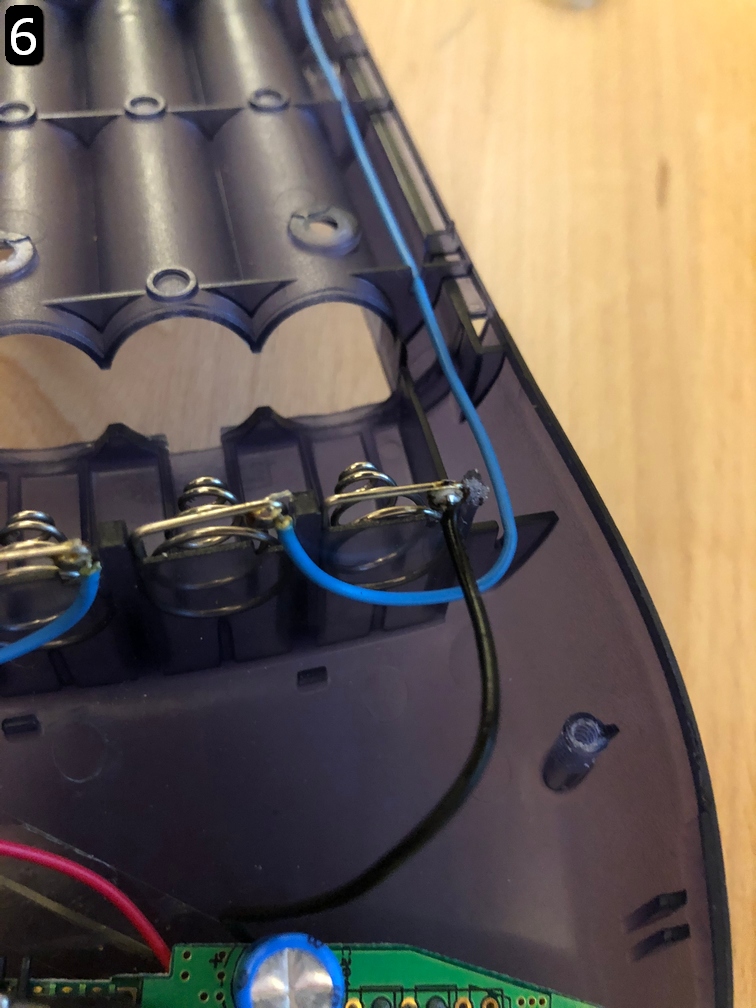
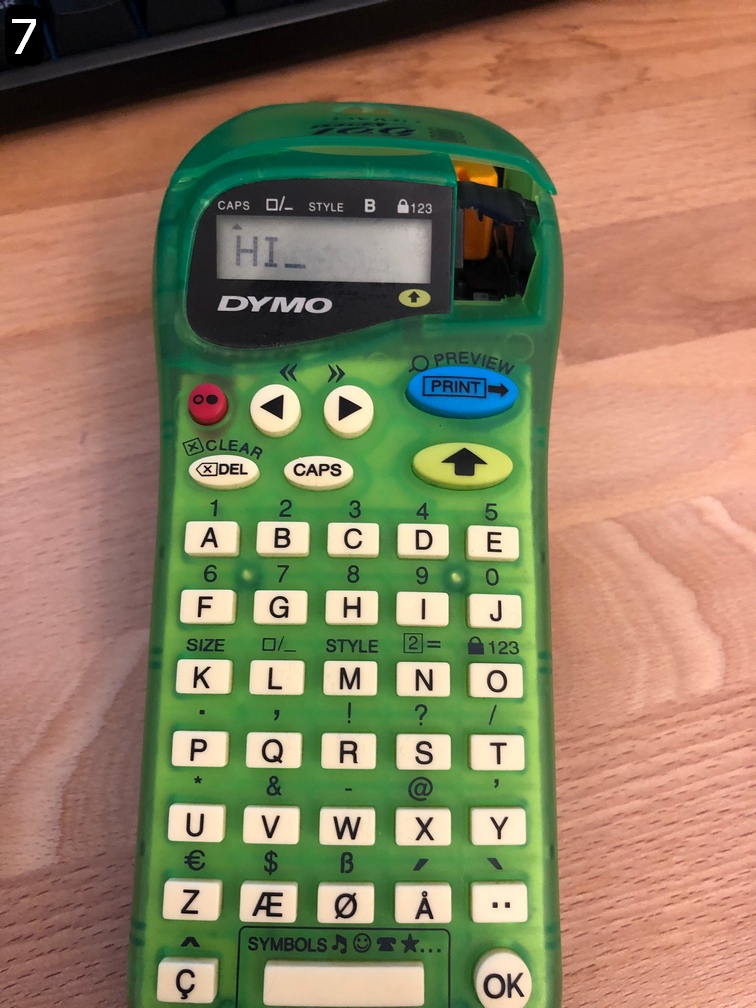
After a first inspection I found a stripped cable that wasn’t attached to anything (picture 2) and the negative-site of the battery-array that has no connection (picture 3). The cable was manually stripped and too short for the way. It was in fact the powerline for the mainboard (see 4). After soldering a new wire to the board and the terminal (picture 5 & 6) the printer shows its first signs of life (7).
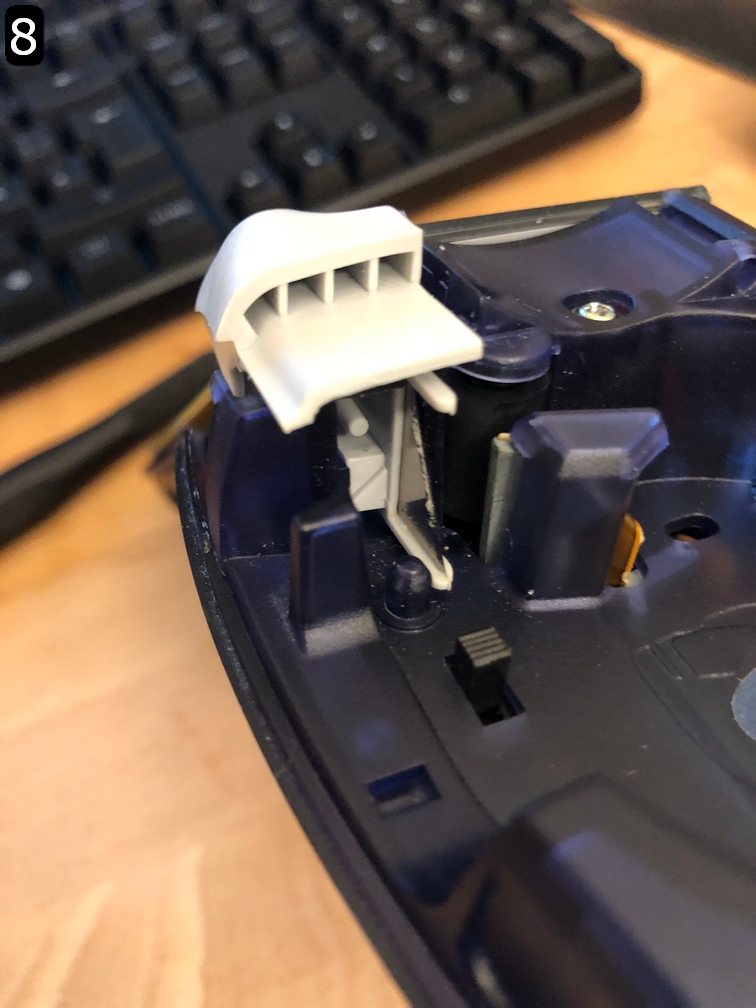
The long spring (in picture 1 bottom) is for the cutting mechanism in picture 8. But there seems to be missing a support-part. So the automatic backflip of the blade is broken. :/
After some cleaning of the rubber roller, thats forwards the tape, with some isopropyl the system worked again as it should (except the autoreturn of the blade).
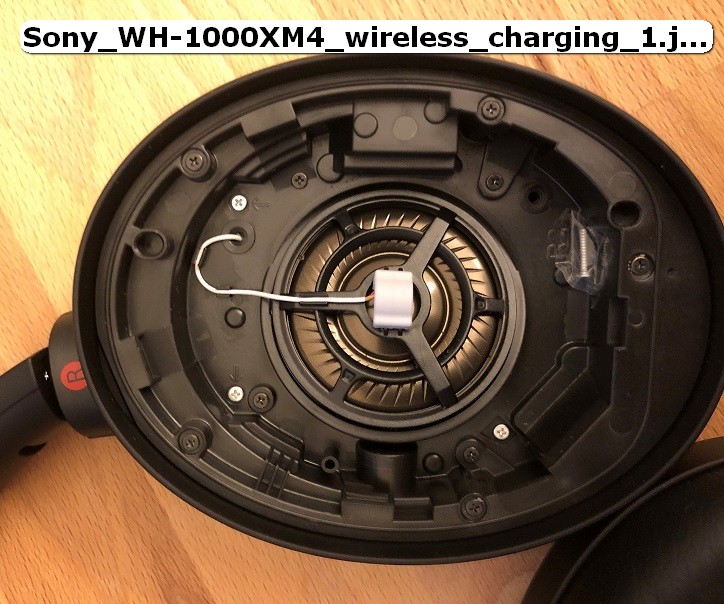
I love my Sony WH-1000XM4 headset. But it bothers me that you can’t charge them wirelessly. So I wanted to change this. Here is the story:
I started by opening up the headphones and located the charging-port. It’s on the right earcup on the backside. To get to it you have to remove the cushion and the lid which holds the right speaker and a microphone. Be careful not to rip any of the fine cables. You cannot remove the lid entirely because the cables are poke through little holes and are soldered on both sides. After disassembly of the lid, you can remove the cup on the backside. It was hold by the silver screws that you see in picture 1 (notice that on the picture one screw is not in its designated whole. This is because the picture is from the reassembly process – more on that later).
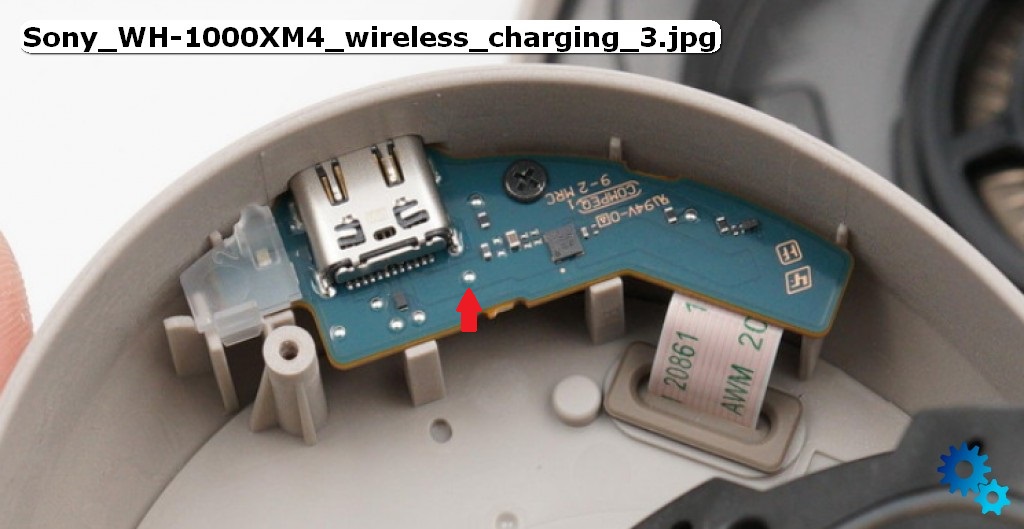
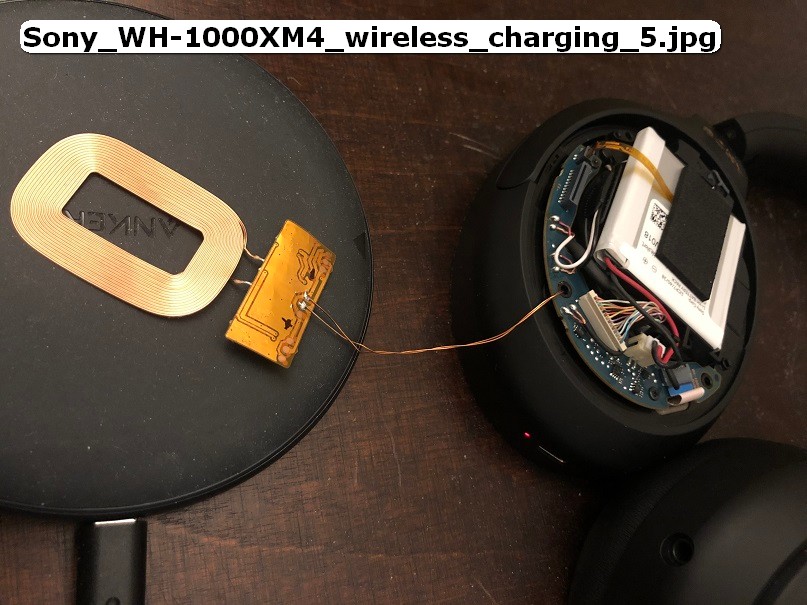
After removing the charging port (picture 3) I measured the exposed pads on the board and found the marked one to have 4.6V while charging with a 5.1V supply. I concluded that this is because of a diode voltage-drop in the chip directly south from the USB-C port. I used this entry point and added my own charging voltage here. For the desired voltage-drop I used a LL4148 100V 0.2A diode. I concluded that the wireless charge pads I used never go above 200mA (even they stated 1A charging – AliExpress-quality). I reenforced the work with some glue because the solder pads from the boards are not very good. You can see the result in picture 4.
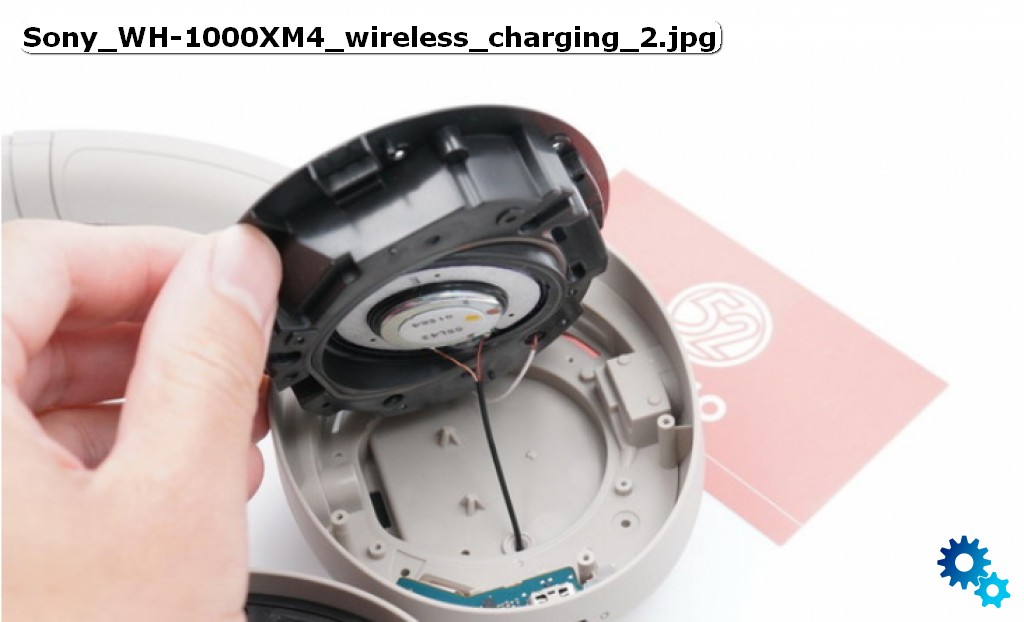
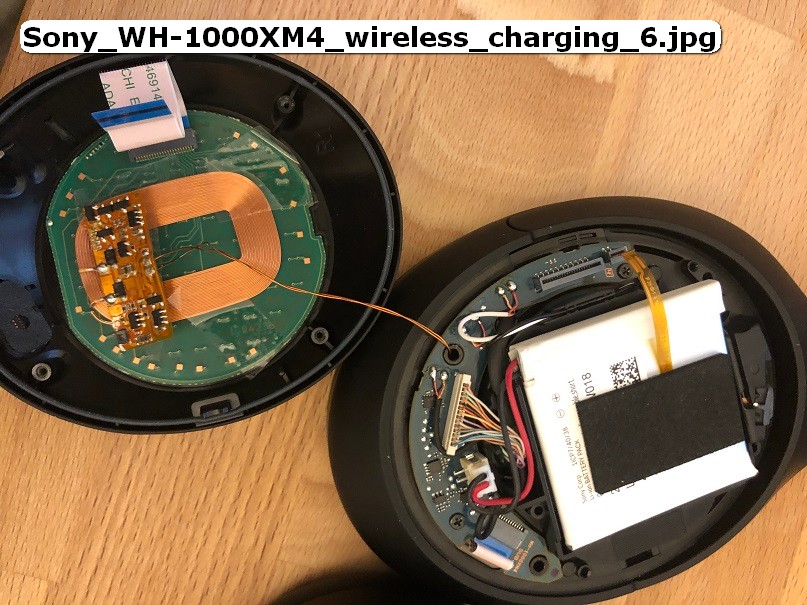
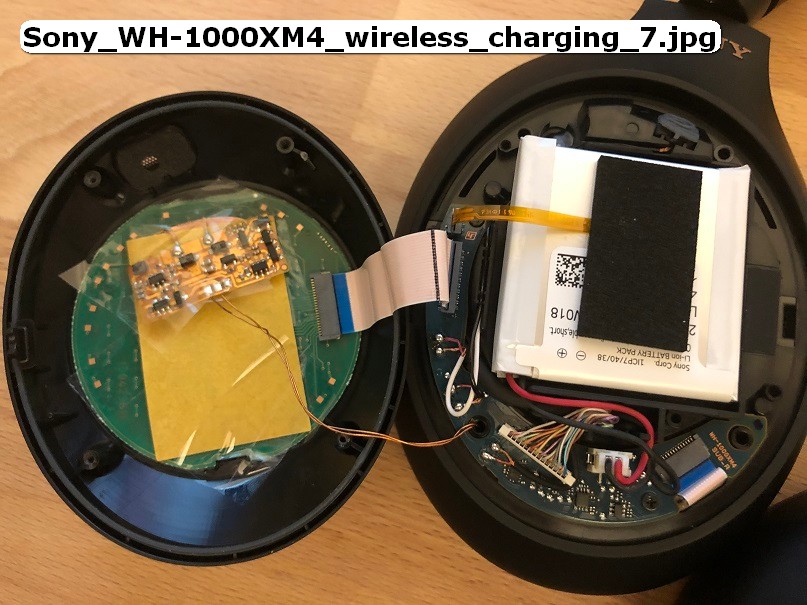
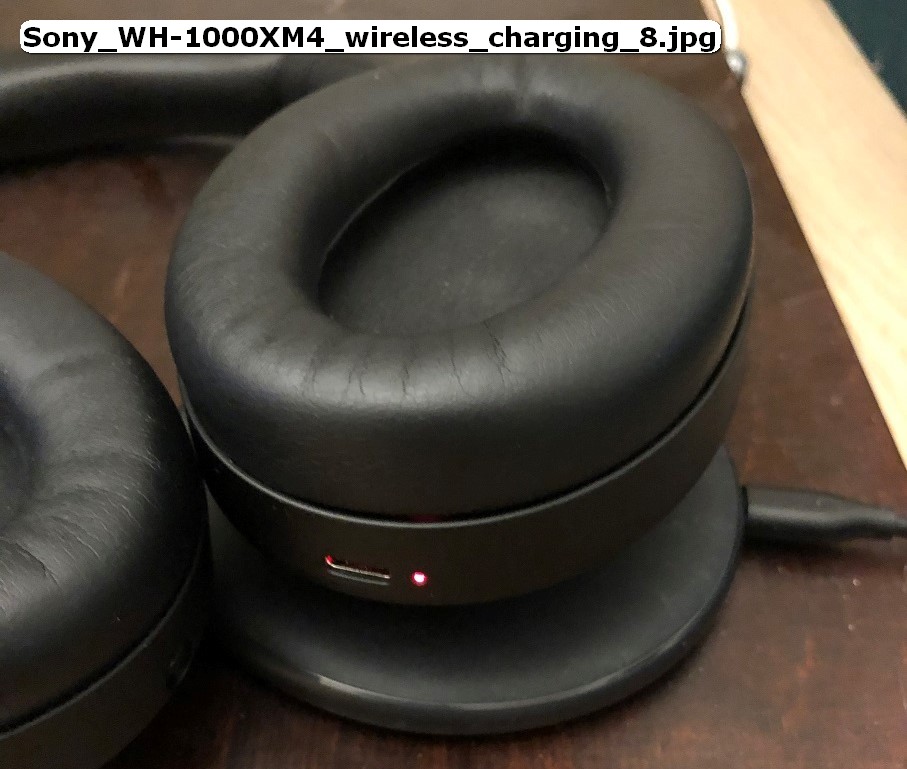
I reinstalled the charging-board and fed the cables through one of the existing screw holes to the backside oh the earcup. There I installed the cheap wireless-charging-circuit and the charging-coil. After testing it – as is – I concluded that it worked barely. I didn’t do inline-measures because it was late but the battery-voltage was raised by the circuit around 100mA while charging via USB-C and 11mA while charging via wireless (picture 5). I stuffed everything in and closed the back cup for a ‘closed test’. This didn’t work at all and I concluded that the gap between the charger-coil and the receiver-coil is too big. I taped the receiver-coil at the back of the cup (picture 6). Notice that there is a circuit-board in the back of the cup. This is for gesture- and volume-control. This will lower the power transceived even further. I hoped that the magnetic field wasn’t too blocked because of this but I was wrong. The charging doesn’t work after this so I put some foil behind the coil to strengthen its effect. This worked barely. You can see the charging-circuit starts up if I place the headphones on the wireless charge pad (picture 8). I also tested that normal charging (via USB-C) and the headphones work properly. After this I put all together. I left out the silver screw south-east because I fed the wires through this hole.
The next day: I tried to charge my headphones this way. They were at 90%. After 1 hour they were still at 90% but the charging-led was blinking (normal it on or off). I took the headphones of the pad and noticed that the cup was very hot. The circuit shuts itself down probably due to overheating of the battery (see picture 6: the flex cable that go on top of the battery – this is a heat-sensor). My guess is that the trickle-charging is enough to activate the charging-circuit but not enough to really charge the battery and this messes up the battery (maybe a little shorting though the circuit ?). I have to investigate this further by charging though my ‘system’ via a bench power-supply so the circuit gets a healthy 250mA or so. And if this worked then I had to add more coil to the charging circuit. But this will be work for another time.
Links: Pictures from the headset (white version) [here] Pictures from the headset (black version) – my own Software for adding labels in pictures [FastStone] The used chargepads [AliExpress] DO NOT BUY – THEY ARE BAD
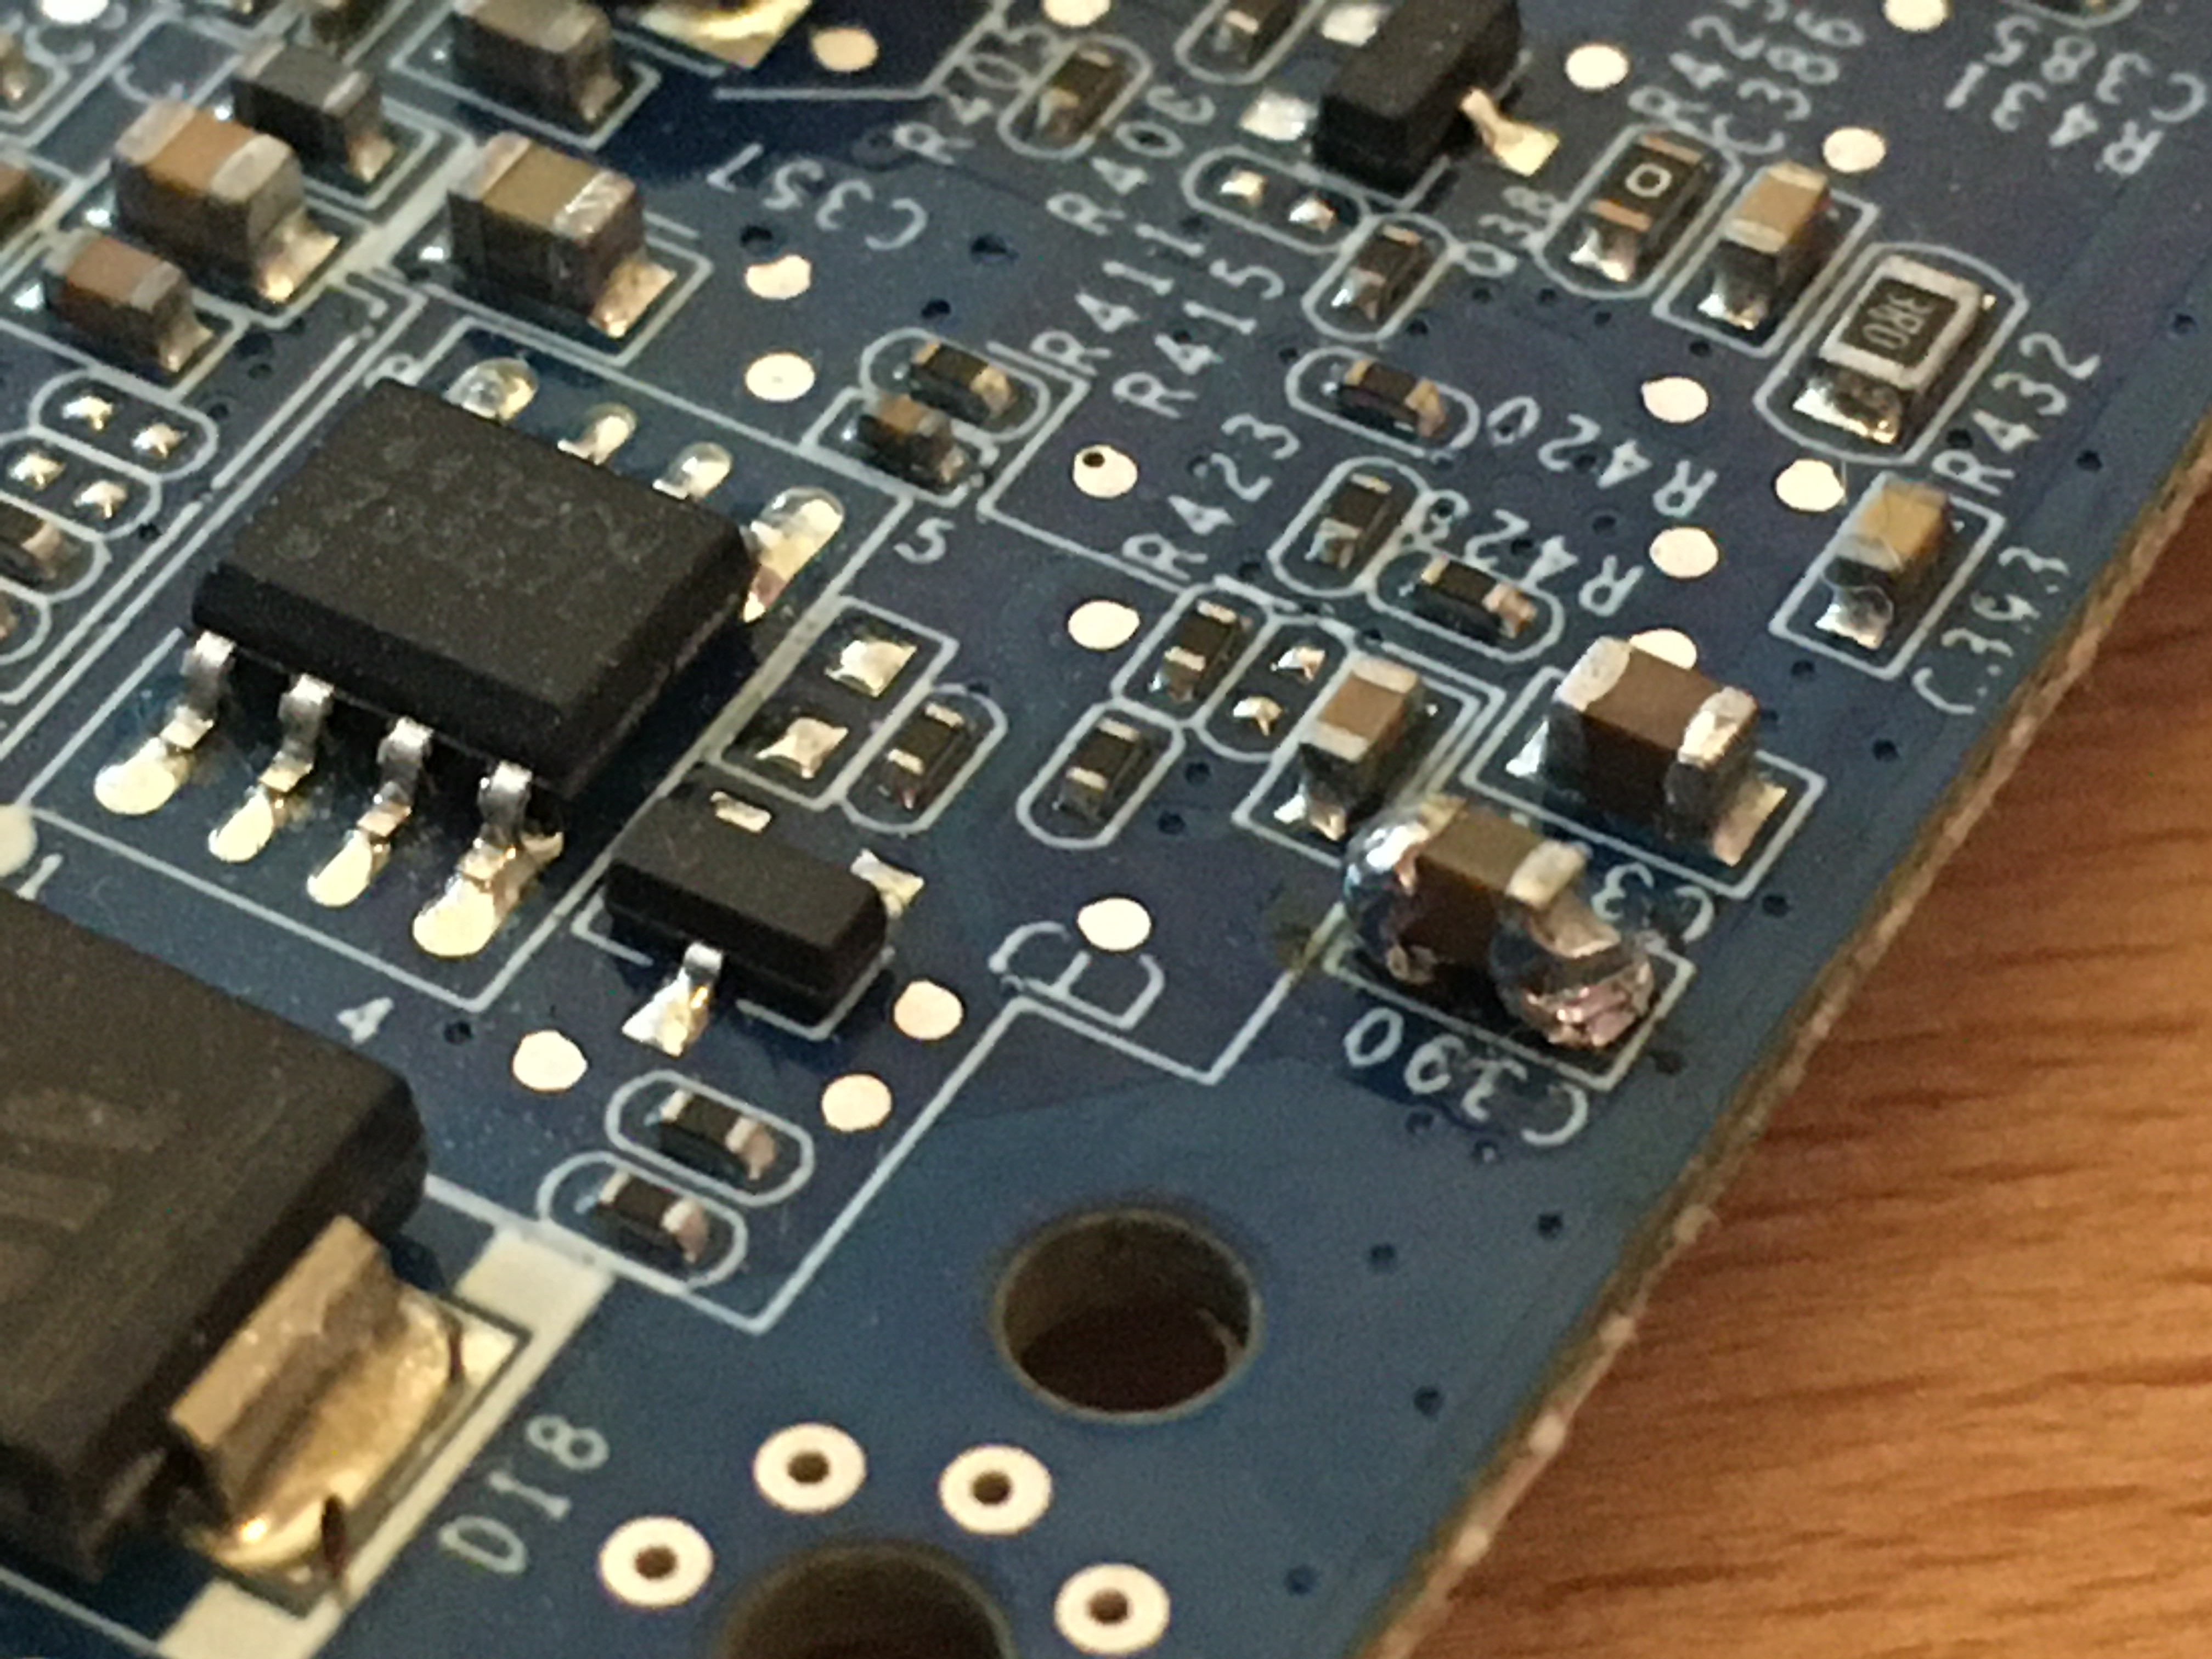
My DS416 broke. The Powersupply was okay but there was no reaction from the NAS if I switched it on. No LED or FAN. After some digging I found the cause. Capacitor C390 was shorting (get really hot). I replaced the Capacitor with an 10μF (i think). Now the NAS works like a charm (again).
(!) The Capacitor is glued to the PCB. Try not ripping pads.
The solering-job is poor because I ripped the pads and want to make sure all 3 Points (backpad, frontpad and Cap) are connected
addendum: After a couple of days the NAS stopped working again. After a fix check both caps (C390 and the cap next to it) are broken. They they seems to be in parallel. After changing both the NAS worked again.
addendum2 (month later): The next cap died. This time it was C150 – found on the underside near the power-connector.